Every camera—yours, mine, and even all the way back to Louis JM Daguerre’s—is fundamentally just a lightproof box.
We control how light enters the camera in two ways: the aperture and the shutter.
Light enters through an aperture in the lens, passes the open shutter and finally hits whatever light-sensitive medium the photographer has chosen to use—a digital sensor, film, or a copper plate painted with silver in Daguerre’s case.
(With modern cameras, you can control your light sensitive medium as well, but I’ll leave that topic for my article on ISO settings.)
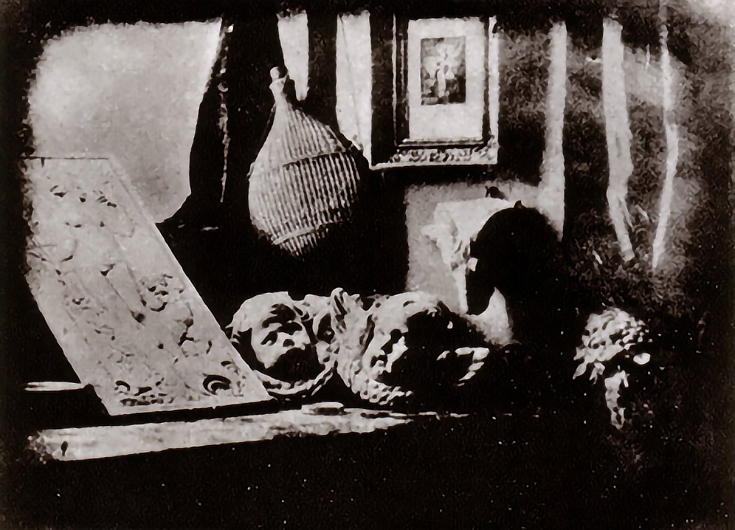
L’Atelier de l’artise, taken in 1837 by Louis Jacques Mande Daguerre.
The aperture is like a window; the larger the opening, the more light fills the camera. The shutter is like curtains; the longer they are pulled back from that window, the more light is allowed into the camera.
For the photographer, the shutter and aperture are as much creative tools as technical controls.
Learning to effectively use these tools is, quite honestly, as easy as switching off your camera’s “auto” setting and trying it out. Today, we’ll look at the purpose of the camera shutter and some of the ways photographers can exploit it for creative imagery.
Understanding the shutter
If you want to use something well, first you need to know what it is, and how it works.
The shutter is built into the camera body. If you remove the lens from its mount on an SLR or DSLR, you can see the closed shutter (made of black cloth or metal) behind the mirror.
The shutter’s job is simply to open so that light can enter the camera. The longer the shutter is open the more light enters the camera. Bright light requires a shorter shutter speed and dim light requires a longer shutter speed to correctly expose an image.
Depending on your subject matter and your light, you’ll probably find that you require shutter speeds ranging from a few seconds up to a few thousandths of a second.
Using the shutter creatively
When thinking about shutter speed, ask yourself “how slow or fast?”
1. Use a fast shutter speed to freeze movement
Taking a photo of a crashing wave, laughing children or anything that changes in the blink-of-an-eye requires a speed of 1/250 of a second or faster.
Since photographers and their subjects tend to move around enough to blur an image, faster shutter speeds can be more useful than slower speeds if you want to get a sharp, clear image of something that’s moving.
2. Use a slow shutter speed to show movement
In other situations, an image may need a much slower shutter speed. You can do this if we want to suggest motion, or if you intentionally want the subject to be blurred.
If the shutter is set at 1/8 of a second (which is much slower than the previous example of 1/250 of second), the crashing waves used in the previous example would be blurred because they’re moving so fast.
You can use a tripod and set the shutter speed VERY slow, at 15 seconds for example, and multiple waves will have been exposed in our image, creating an abstract and ghostly blur.
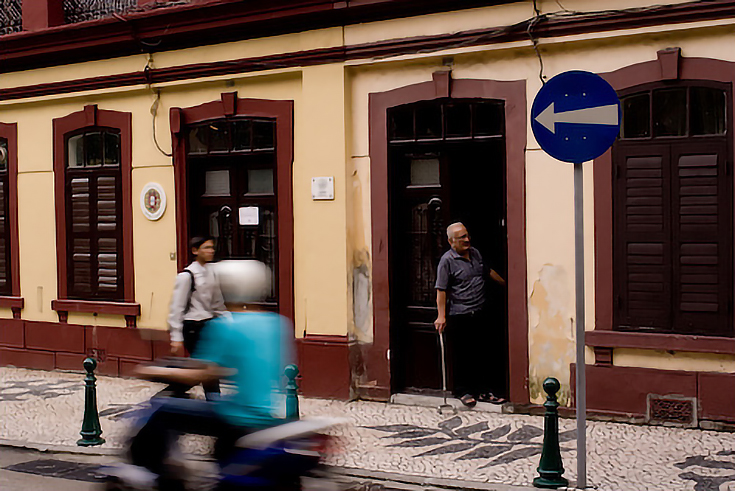
In the photo above, I exposed the picture for 1/30 of a second—long enough to blur the moped rider in the foreground, and the pedestrian behind him. This helped me convey the contrast between the man standing in the doorway, and the frenetic pace of the street in front of him.
3. Use a slow shutter speed to include ambient light
Candle light, sunrise and even harsh streetlights can be used to create atmosphere in a photo. Sometimes these ambient sources of light will be quite bright (i.e. a sunny day), but other times they’ll be relatively dim.
To fully capture these more subtle qualities of light you will need to use a fairly slow shutter speed—speeds around 1/30 or down to 1/15 of a second are typical. This allows enough light to enter the camera to expose the image.
You can make use of ambient light, either by itself or balanced with the camera’s flash, to give an image that je ne sais quoi that makes moody photos so. . . moody.
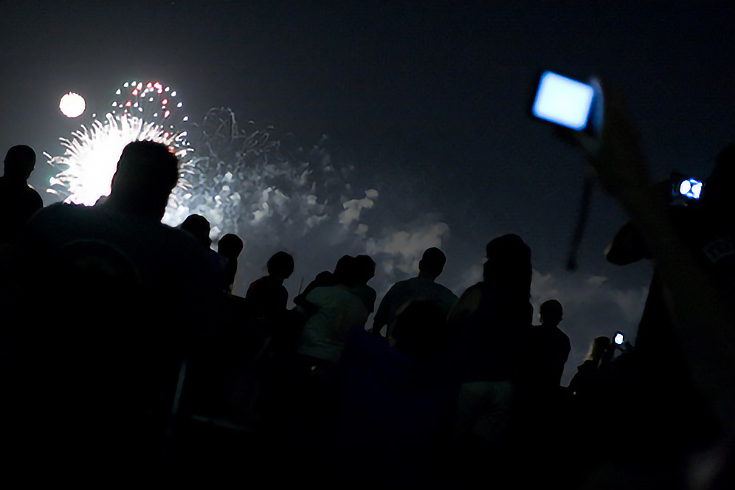
Here, I silhouetted the spectators with a shutter speed of 1/25 of a second. . . I believe the atmosphere of the crowd is as much a part of the spectacle as the event itself.
4. Hints for shooting with slow shutter speeds
A well-practiced photographer may be able to hand hold a camera mounted with a wide-angle or normal lens and avoid blurry pictures with shutter speeds above 1/15 of a second, but keep in mind that telephoto lenses magnify even the slightest movement of the camera.
You’ll get better results if you use a tripod or beanbag—or improvise something—to stabilize the camera when using a shutter speed slower than 1/30 of a second. (After all, we’re using a slow shutter speed intentionally we want a blurred subject not an image blurred from a shaky camera.)
Some situations may need dramatically longer or shorter shutter speeds. A photo of a star trails in the night sky might require an exposure of hours. But, if you want to capture the moon and crisp constellations, you’ll only want to keep your shutter open for 10 seconds or so.
Meanwhile, to capture a diver splashing into a swimming pool, or a basketball player mid-dunk, you’ll want to use a shutter speed that’s 1/2000 of a second, if not faster.
While the shutter only allows light to hit the sensor ever so briefly before snapping closed again, that time has a big impact on the look of our photo. So turn off “auto” and see what happens!
This post may contain affiliate links.


