It may not seem like it at first, but knowing who visits your art blog and what they do once they’re on your blog can be extremely beneficial.
A good hit counter will not only tell you how many visitors you have, but where they go once they get to your art blog—for example, do they browse around? Do they read the landing page and leave? Do they visit your e-store?
Your stats counter should also tell you which posts are the most popular, which days have the most traffic, what words or phrases were used in the search engines to find you, and if any other websites or blogs directed visitors to you.
A quick online search will reveal several free and paid hit counters. I, however, have chosen StatCounter for its ease of use and its ability to upgrade from a free to a paid service when your blog outgrows the “free” features.
Below are the steps necessary for adding StatCounter on your Blogger art blog.
Step 1: Create a StatCounter account
Go to www.statcounter.com and click on the big blue “Register Now” arrow.
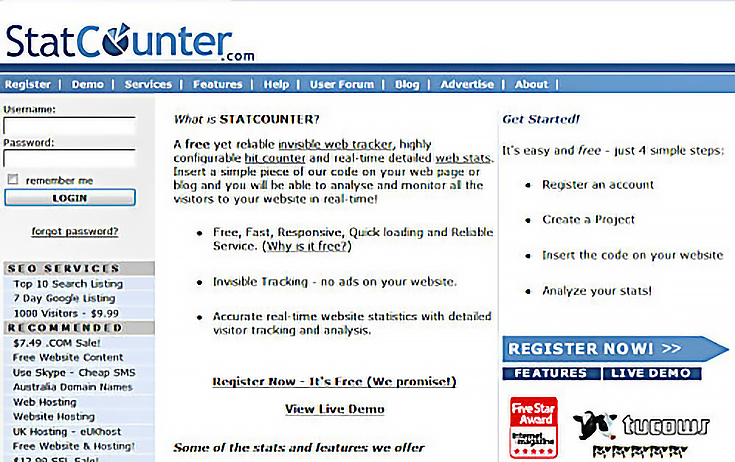
Once you click on the “Register Now” button, you’ll be taken to the setup page below.
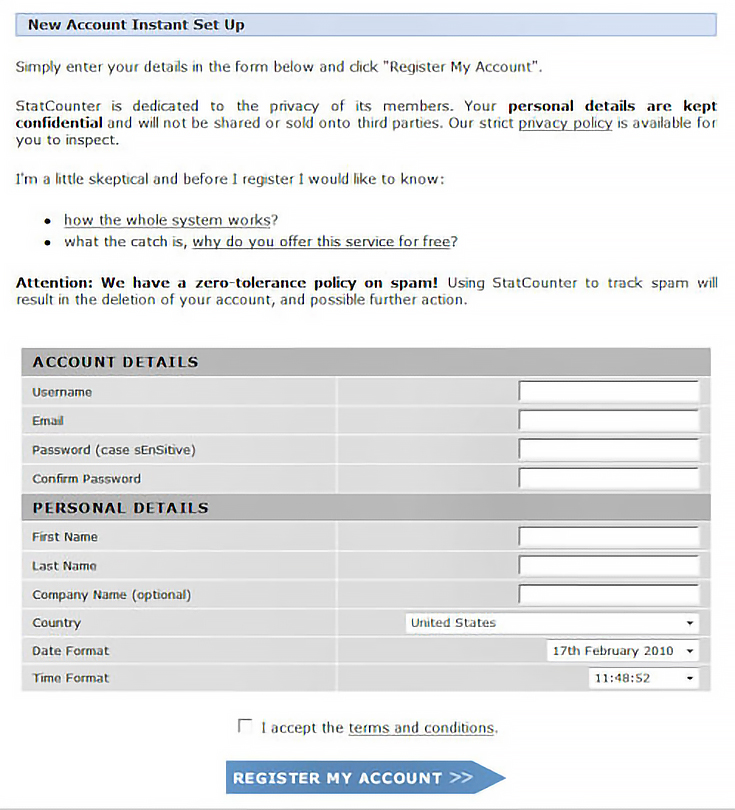
Fill out the required information: user name, email address, password, first and last name, company name, and country you reside in. Then select the correct time and date. Next, read through the “Terms and Conditions” and check the “I accept” box.
Next, click on the “Register My Account” button to create your account.
That wasn’t hard, was it? But wait, there’s more.
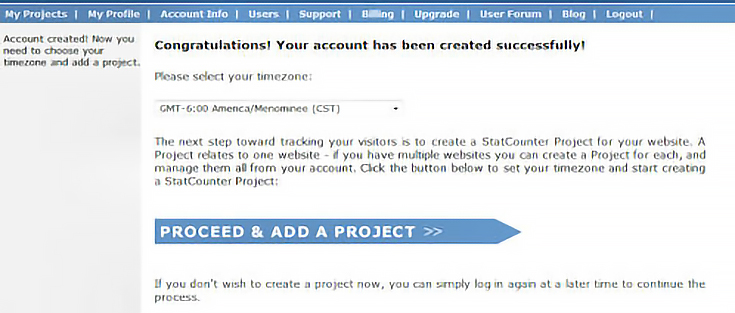
Step 2: Select your time zone
Before you can start tracking your visitors, you need to tell StatCounter what time it is where you live. Scroll through the list of time zones available, select your time zone, and click the “proceed and add a project” arrow button.
Now it’s time to let StatCounter know which website it should be tracking.
Step 3: Create a project
Once you click on the “proceed and add a project” button, you’ll be taken to the following page:

Insert the title of your website, the url address, select a category from the dropdown menu (I’ve selected arts), change the maximum visiting length to 24 hours for a more accurate reading of your daily visitors, and select the “next” button.
Notice that I did not have you change the log size. . . that’s because the free stat counter only comes with a log size of 500. Also, you don’t want to advertise how many visitors you have coming to your blog, especially with a new blog, so do not click the “allow anyone to view your stats” box.
Here’s the next page that you’ll see—just a few more steps to go.
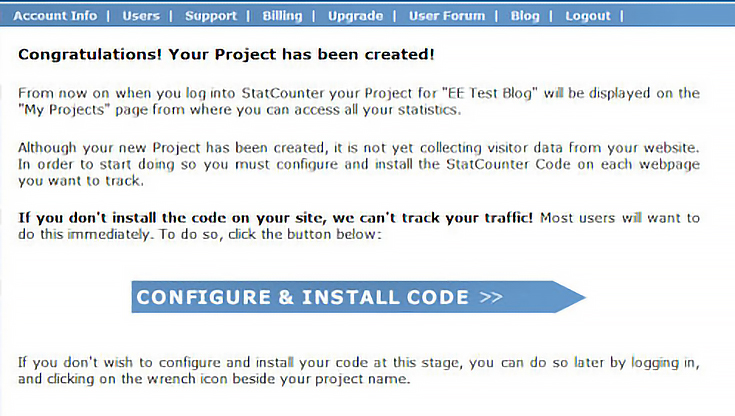
Step 4: Configure counter code
Once you click on the “configure and install code” arrow button, you’ll be taken to the code setup page.
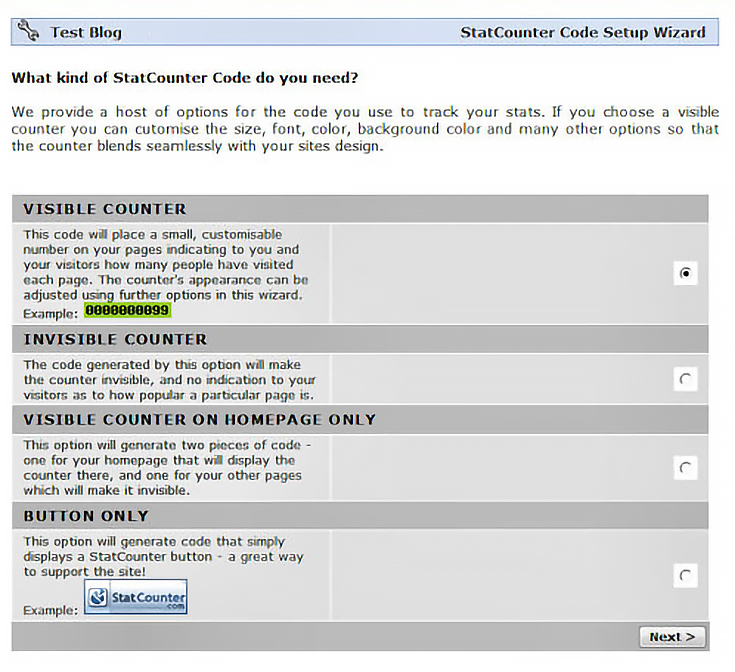
All you have to do is select the “invisible counter” button and click the “next” button. You’ll see the following installations options page:
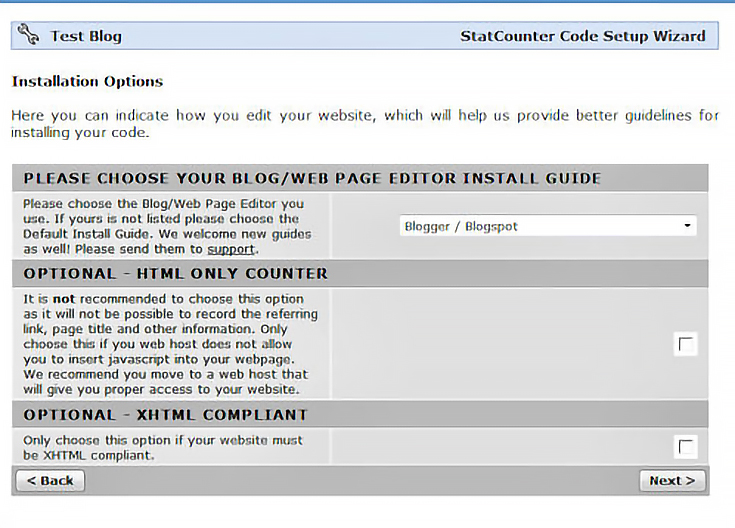
This is where you’ll tell StatCounter that you have a blogger art blog. Scroll through the dropdown menu and select the “blogger/blogspot” option and click “next” again.
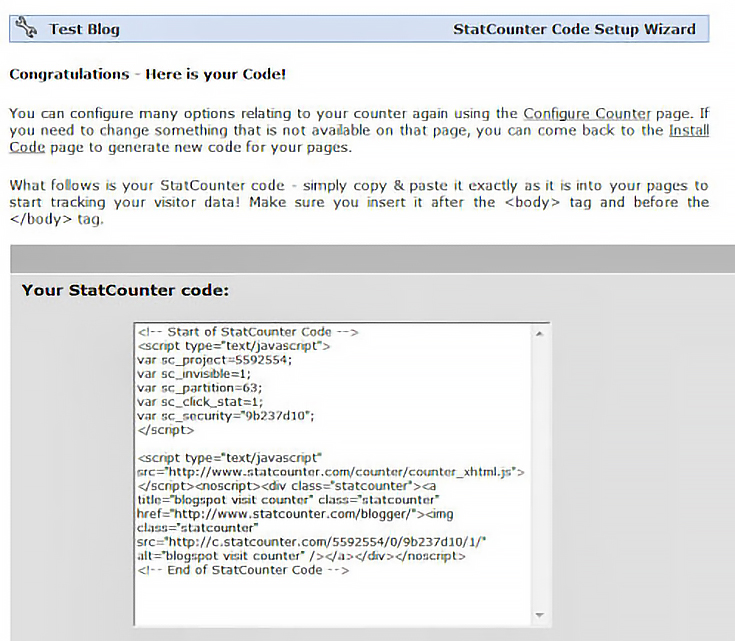
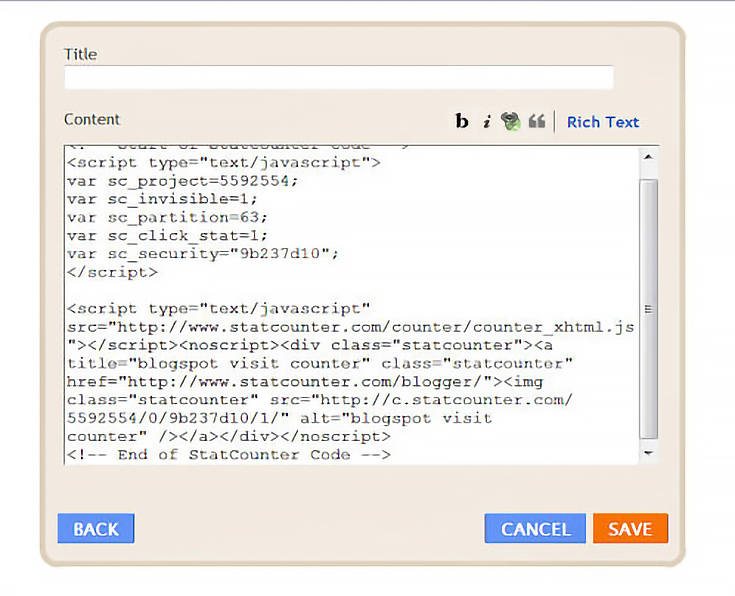
At this point the code is right in front of you, so go ahead and copy it. Highlight the entire section of code by clicking on it—make sure it’s ALL highlighted—then press “CTRL+C” to copy it.
Now you need to hop over to your Blogger account to place that code.
Step 5: Insert code into Blogger
Open a new browser tab (or browser window) so you can come back to your StatCounter account later, and go to http://blogger.com.
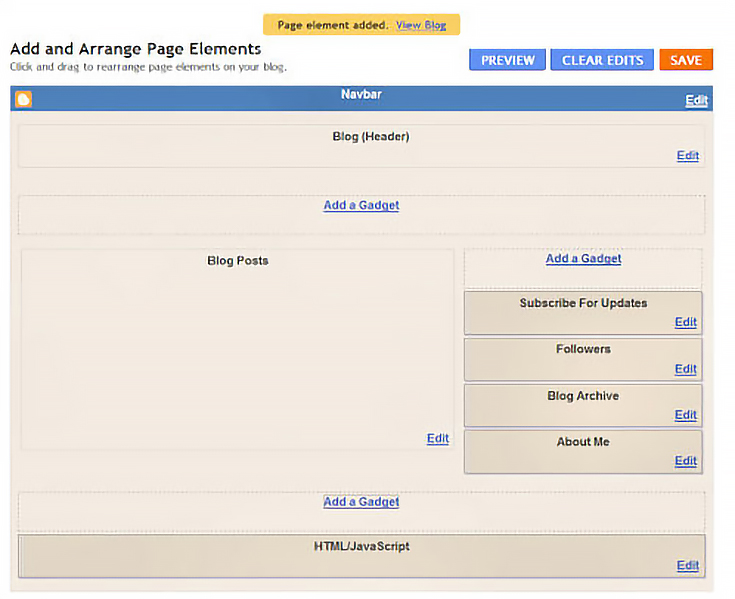
Enter your user name and password to log in, then click on the “Layout” tab. Next, click on the “add a gadget” link on the bottom of the screen.

Clicking on the “add a gadget” box will take you a page with a lot of gadgets listed, as seen below:
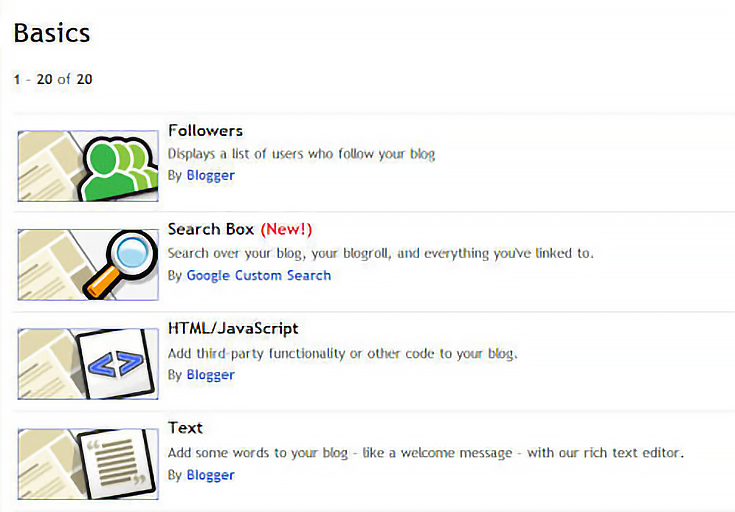
The one you want is “HTML/JavaScript” so click on that link to be taken to the following page.

Place your cursor in the large box and then press “CTRL+V” key to paste the code that you JUST copied from your StatCounter account. Do not add a title to this box. Your counter will be invisible; therefore, a title will be useless.
Click “save,” and voila! You’ve just added an invisible hit counter to your blog!
Step 6: Test your counter
Once your counter is inserted into your blog, click on the “view blog” link at the top of the screen. This should add 1 page view to your blog.
Now hop back over to your StatCounter account and click on the “My Projects” link in the upper left hand corner of the screen. You’ll be redirected to the following page:

I know it’s a little difficult to read due to resizing, and I apologize for that, but this is where you can go to make sure your counter is working. If it is working, you should see a “1” (or more) under the far right heading, “Today.”
Later, you can explore your counter a bit more and see who is visiting your art blog just by clicking on the name of your blog. Enjoy!
To learn more about using the features inside StatCounter, read the free, online “Getting Started” manual at www.statcounter.com/help/getting_started.
This post may contain affiliate links.