In today’s tutorial I’m going to show you how to make a special “Angels & Snowflakes” gourd ornament for the holidays. You can apply many of these techniques and instructions for any kind of gourd decorating you’re interested in.
Assuming that you’ve already cleaned and dried your gourd, it’s fairly easy to turn it into a simple gourd ornament by using a Walnut Hollow woodburner.
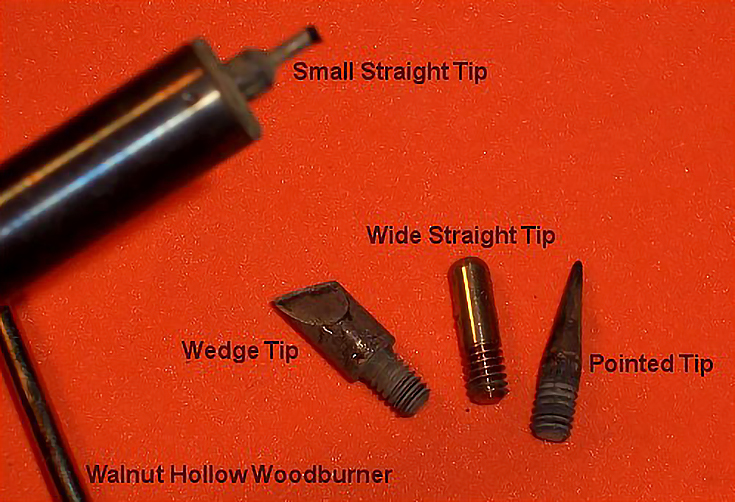
For tools, you will just need the following burning tips in addition to the woodburner itself: a small straight tip, wide straight tip, wedge tip, and pointed tip.
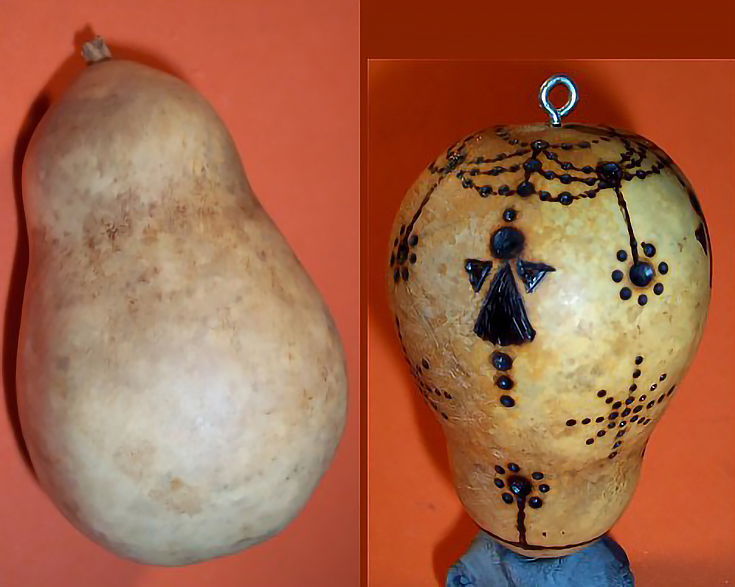
Below is a before and after picture of the gourd ornament I made. It has circles of dots at the top and bottom, four angels and four snowflakes.
How to make a gourd ornament
Begin by using a pencil to draw guidelines down the shell. They should divide the gourd into four equal parts, all the way from top to bottom.
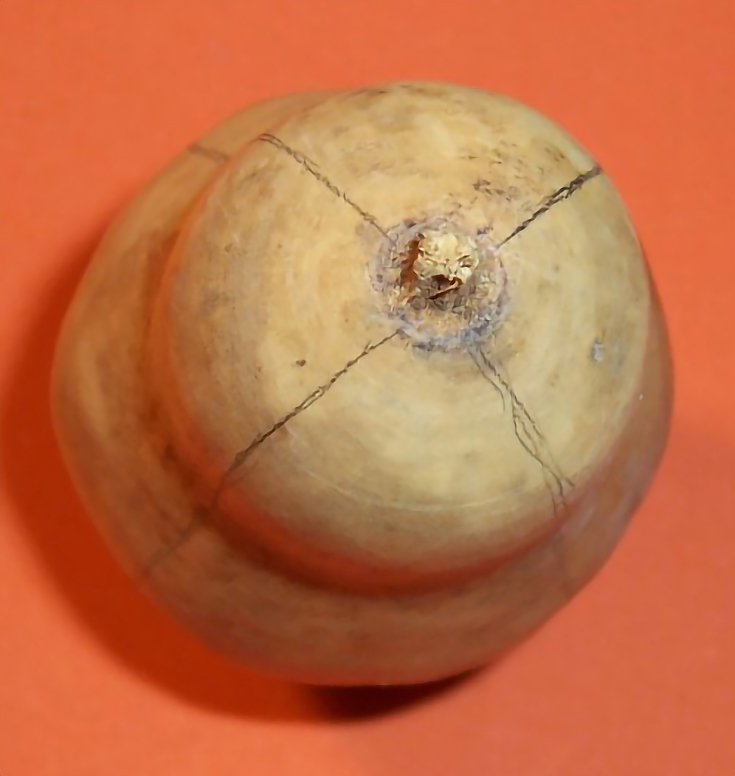
Then, divide those lines again with your pencil, so the gourd is divided into eighths. These lines will help you know where to place your elements on the gourd.
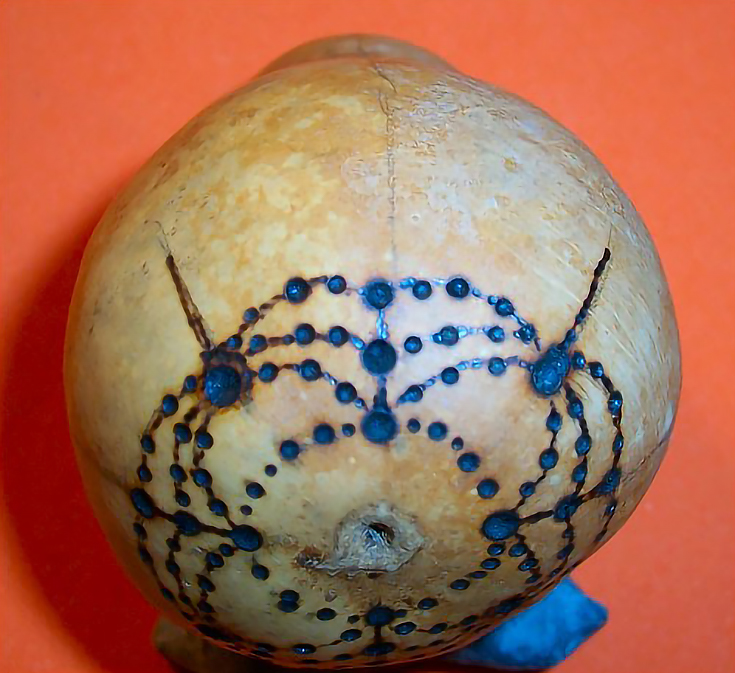
Once those lines are in place, you are ready to start burning. Use the wide straight tip and burn the dots shown in the next image. (Ignore the curved lines for now.)
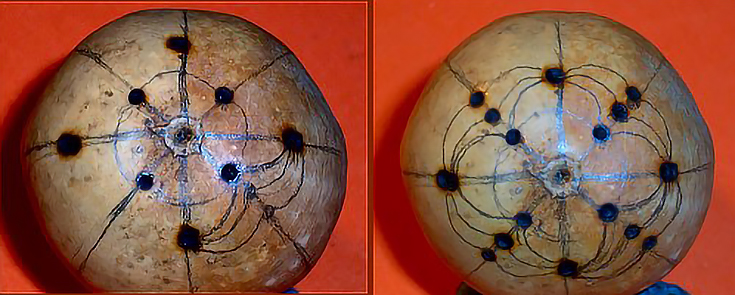
Notice that the larger dots are placed farther out than the smaller three-in-a-row dots.
Now put the small straight tip on your burner. While the tip is heating up, draw those curved lines connecting the dots as I have shown in the image above. Again, these lines are just guides.
Burn small dots along those curved lines using the side edge of the small tip. Continue until your scalloped lines look like this:
When you’re finished, erase the curved pencil lines that guided your dot placement. You should now have a highly decorative pattern of circles and dots.
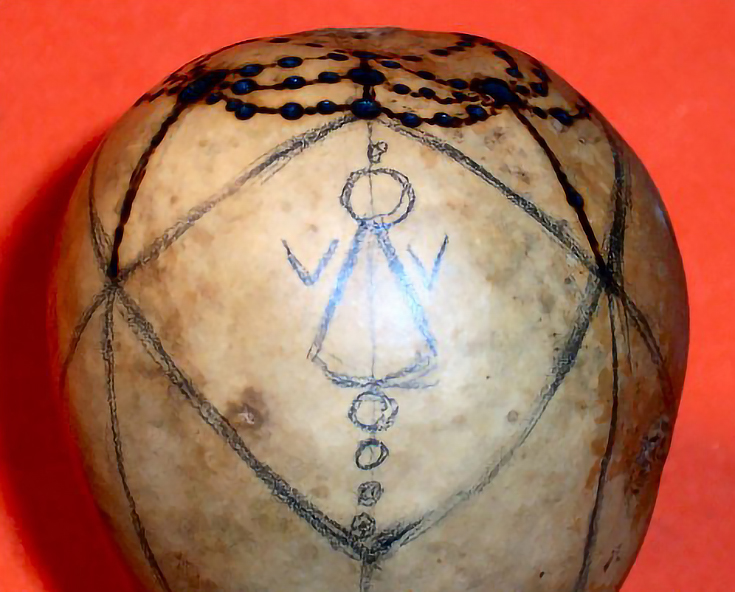
Now it’s time to burn in the angels. Burn a straight line down from where the two scalloped lines meet. Then use your pencil to create a diamond pattern. (See below.) Draw your angels in the center of the diamond like so:
Next, change the tip on your woodburner to the wedge tip. Align the pointed tip to the top of the angel’s triangular body. Sweep the burner left to right to darken and fill it in. Now turn the gourd upside down and do the same thing to the wings.
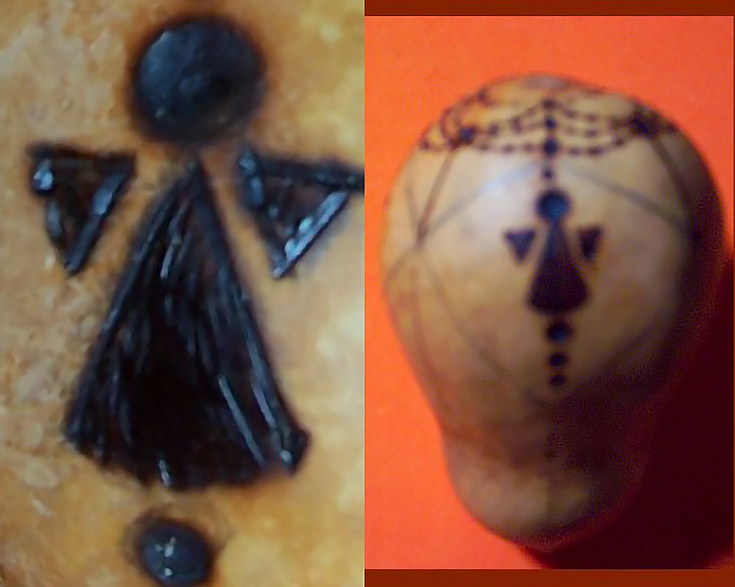
After all of the angels’ bodies and wings are done, change to the wide straight tip and burn in the angels’ heads. Also burn in the first circle beneath each angel’s body.
Change the tip to the small straight tip and burn two more circles below the one you just did, making each one a bit smaller than the one before. Now burn a small circle above the head. The angels are now complete.
Change to the pointed tip. Find the guidelines between the angels and burn in the snowflakes as follows:
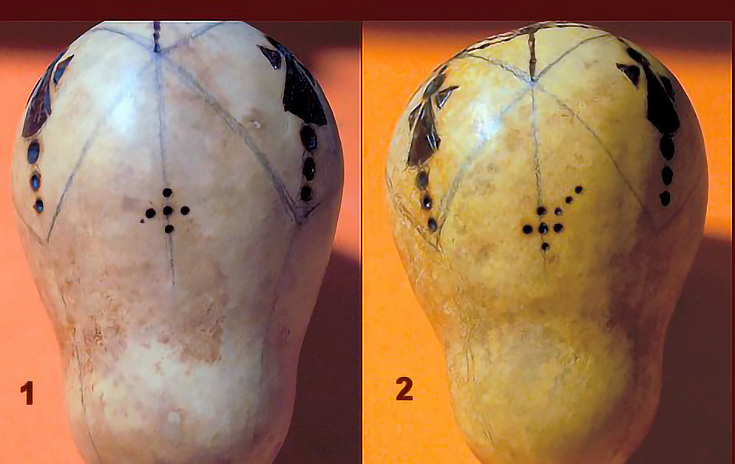
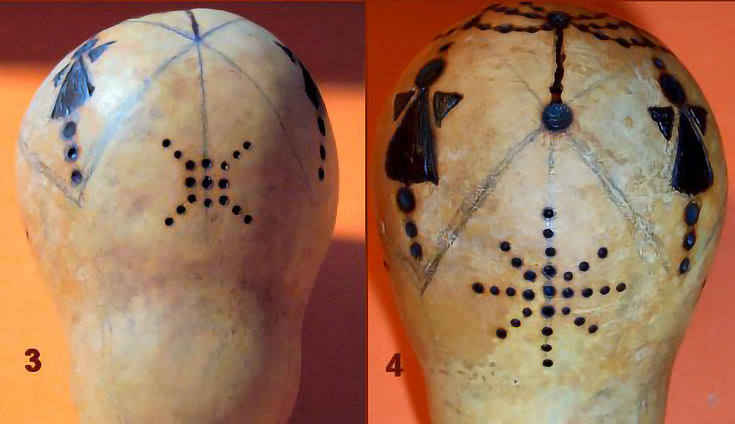
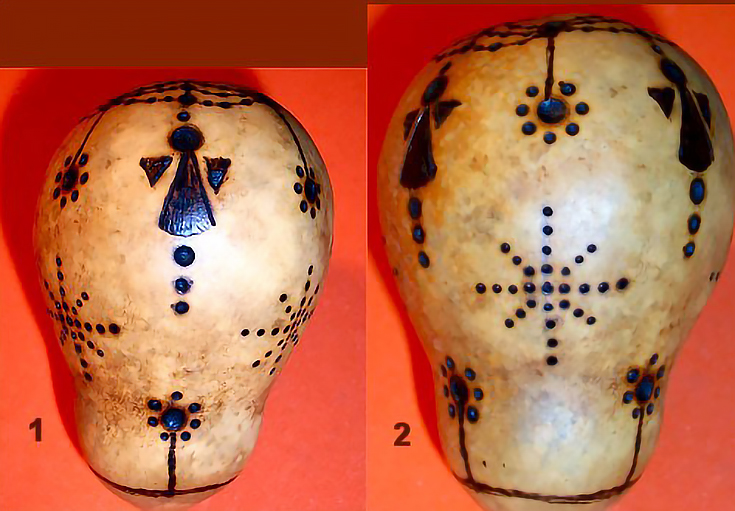
Switch to the wide straight tip and burn a large dot midway between each angel where the diamond patterns meet (see #1 below). Also, burn one large dot far below each angel (see #2 below).
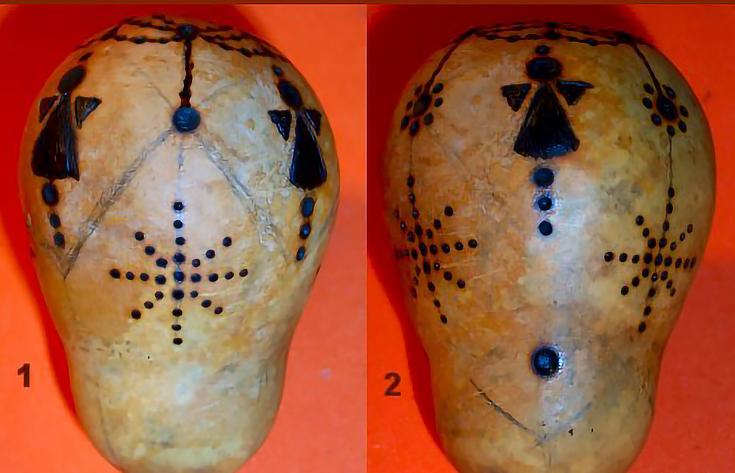
Change to the smaller straight tip and burn seven smaller dots around all of those large dots, then add a straight line downward. Finish your ornament off by burning a line all the way around the gourd at the bottom.
As you burn, think about the tip you’re using and whether or not that same tip will be used in other areas of your design. Whenever possible, do multiple sections at one time with the same tip. The less you change your tips, the less time you waste waiting for them to heat up or cool down.
Be sure to erase all pencil marks from the gourd before you seal it, since the sealant will really make them noticeable. If you can’t get the pencil marks all the way off, lightly sand the ornament with fine sandpaper and wipe the dust away.
Lastly, but still very important, grab an eye screw for the top and some sealant to cover the gourd. I like to use Minwax Polycrylic.
Happy Gourding!
This post may contain affiliate links.