Have you ever thought of painting over images of historical locations or events?
If you haven’t, you might be surprised at how superimposing one image onto another (especially one from a past era) can add a new dimension to a painting, and produce wonderfully evocative results.
Overlaying not only provides virtually limitless possibilities for adding great-looking bits of information and detail to your painting, but it’s just about guaranteed to have more impact than straight-up WYSIWYG (what you see is what you get) work of art.
The concept is also very simple—just take one original, straightforward image of any subject, and paint directly over the top.
There are no real rules for what you paint. The second layer of imagery may be abstract or concrete. It can highlight some aspect of the subject, add detail and enhance design, introduce the concept of time, or simply add an element of mystery.
New layers can be applied with traditional mediums (like oil or acrylic) or by scanning and manipulating photographs or text with a computer program like Photoshop.
The main advantage of using a computer to create overlays is all the additional control you have over the final image. By selectively brightening or sharpening layers, or altering the layer blending mode, unlimited possibilities are made available.
This is of course its main disadvantage as well. . . I mean, you could be sitting in front of that computer until somebody pulls the plug!
Here are two examples of overlay paintings, both using historical locations:
Umm Al Nar
The painting below started out as an acrylic painting of the relief carvings from a communal tomb of the Umm Al Nar civilization.
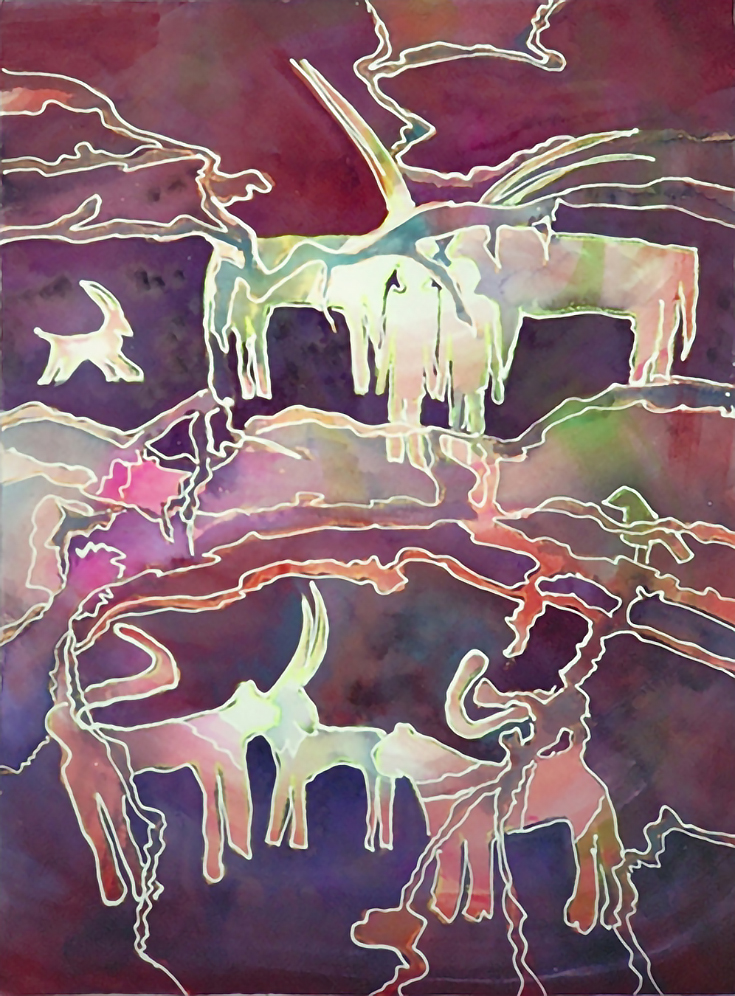
The relief carvings were excavated on the islands of Abu Dhabi at the base of the Jebel Hafit. The colorful overpainting is a pattern representing the rock coloration in the Jebel Hafit, using a technique learned at a workshop with Douglas Walton in Dubai.
Ptolemais (Cyrenaica)
Originally one of the five cities of the Libyan Pentapolis, Ptolemais was founded by the Greeks and conquered by Alexander the Great in the 4th Century BCE.
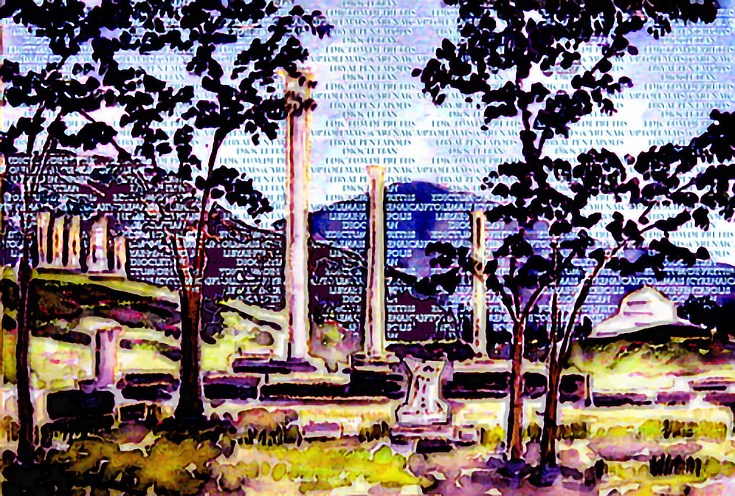
It was passed on to one of his Generals, Ptolemy—hence the name—and then conquered by Rome in the 1st Century CE. Interestingly, it was in this city that Diocletian, a Roman Emporer, pronounced his Edictum De Pretiis (a law that restricted price increases when selling certain goods).
So instead of overpainting with color, the Edictum De Pretiis was overlaid, via computer, on a watercolor painting of Ptolemais.
As I mentioned before, the possibilities are endless—what are your ideas?
Whether you’re a digital or traditional painter, try some of them out this weekend and add a unique extra dimension to your own work!
For more digital paintings from Charlene Brown, please visit her art blog.
This post may contain affiliate links.