I’ve been doing a lot of colored pencil work on sanded pastel paper the last few weeks. Among the lessons I’ve learned is that it’s possible to create highly detailed drawings on sanded pastel paper. It just takes a few special considerations.
First, what is sanded pastel paper?
Sanded pastel paper is a type of drawing paper designed for pastel work. Pastels require a lot of tooth (texture) in order to stay on the paper, so even the smoothest of surfaces designed for pastels have more tooth (generally speaking) than the roughest papers designed for colored pencil.
There are plenty of pastel papers that aren’t sanded. Canson Ingres and Mi-Teintes papers, for example.
But some papers are sanded for added texture. Uart is the brand I’ve been using, but there are others. Fisher 400 is one of the more popular brands and Artspectrum Colourfix is another.
Sanded pastel papers come in sheets, in pads, mounted to rigid supports, and some are even available in rolls. Uart recently introduced a dark sanded paper, so you’re no longer limited to buff colored paper if you want to use sanded paper.
NOTE: If colored papers are your thing and you want to try sanded pastel papers, give the Colourfix and Mi-Teintes Touch papers a try. Both come in a wide range of colors from pale to bright.
Why should I use colored pencils on it?
Now that you know what I mean when I talk about sanded pastel paper, you may be wondering why on earth I’m suggesting it for colored pencils.
First, let me just recommend that every artist do at least one drawing on sanded pastel paper, simply to see what it’s like. In all likelihood, it will take more than one to start getting a feel for it, but at least try it once, if only to try something new.
Once you’ve done that, you’ll see that color lays down so fast and easy on sanded pastel paper, it’s almost like painting. You can’t fill in the tooth of the paper as quickly just by layering, but there are other methods that make drawing easier on sanded pastel paper than on regular paper. . .
5 tips for using sanded pastel paper
Here a few things I’ve learned that will help you get the most out of your paper:
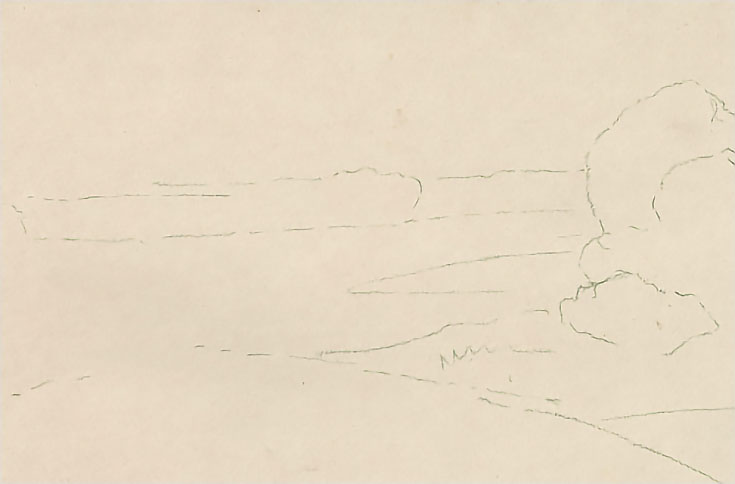
1. Skip the line drawing
I begin most projects with a detailed line drawing. Blame it on forty years of portrait work.
You can still do a line drawing if you wish, but it’s difficult to transfer a detailed line drawing to sanded pastel paper (at least I’ve yet to find a good way to do it.) So rather than put time into a line drawing, I sketch the landscape directly on the paper then start drawing. Since my landscapes tend to take on a life of their own as I draw, I don’t miss the line drawing that much.
I’m not sure what I’ll do if I decide to do a horse drawing on sanded pastel paper, but I’ll cross that bridge when I get to it.
2. Use heavier pressure
When I first drew on sanded pastel paper, I used the same methods I use all the time: multiple layers applied with the lightest possible pressure. It didn’t take very many strokes to discover light pressure doesn’t work very well on such a gritty surface. The pencil skimmed over the top of the texture and left inconsistent color.
So if you tend to use light pressure, just increase the pressure to about normal handwriting pressure from the very start.
3. Take your time
It’s important to remember that colored pencils are a naturally slow medium. Even though I’ve found working on sanded pastel paper to be quicker than working on traditional paper, it still takes time.
Don’t rush, and if you get tired, take a break!
4. Keep a couple of brushes handy
Two brushes in particular.
When you use colored pencils on sanded paper, especially oil-based colored pencils, they behave a little bit like pastels and produce a powdery residue.
If you’re not careful, you’ll end up smearing that residue over yourself and over parts of the drawing where you don’t want it. (There’s nothing more frustrating than discovering a smudge of green in a clear blue sky!)
So the first brush you need is a drafting brush – it’s great for sweeping away that residue. Hold your drawing over a waste basket and sweep the dust into the basket to keep it off your desk, hands, and drawing.
The second brush to keep handy is a bristle brush. Stiff bristle brushes are great blending tools when you combine colored pencils and sanded pastel papers.
Whether you use them with solvent or without, blending is a snap with a bristle brush. Especially one that’s been trimmed or worn down to a nub, so you can exert more pressure with it!
You can also use the powdery residue to “pull” pigment into other areas of the drawing, creating very thin layers of color that allow the original color of the paper to show through. I’ve only used this method a couple of times for landscape drawing, but the results were unexpectedly marvelous.
5. Don’t be afraid to experiment
As long as you’re trying something new—like sanded pastel paper—go ahead and experiment with other things, too! Layer differently. Try a new blending method!
To wrap up, if you haven’t yet tried colored pencils on sanded pastel paper, give it a try. Even if you don’t use it for more than one project, it’s never a bad idea to step outside your comfort zone once in a while.
And who knows? It may become your new favorite drawing surface!
This post may contain affiliate links.