Recently I decided to make some fun labels for my art supply chest that holds tools, markers, and media. I visualized them in watercolor brush lettering, all centered vertically; like this, but with a variety of colors:
Sparkle
Graphite
White
Black
Metallic
Fountain
Deco * Posca
Millennium
Sarasa
Chameleon
Acrylic * Graphic
Sharpie * Noir
Ink
And then I thought—this is a perfect project to lay out on the computer!
In Word, using the Apple Chancery font (because it roughly resembled my brush lettering script) I centered the words and printed out a large copy for reference. This printed list gave me the rough dimensions for each label, and saved me hours of time planning out each label on graph paper.
Now I was ready to letter!
On 90 lb., 12×9” cold press watercolor paper (4 labels to a page) I marked each 2” height lightly with a pencil. For the first word, I hand-lettered “Sparkle” on a scrap paper to check its width. Then I marked the center of the watercolor page in pencil and wrote out “Sparkle” again, using several shades of watercolor as I went.
This technique feels a bit like dipping your brush into the pot of gold at the end of the rainbow. Really! Since any shade can magically appear before your eyes while lettering, you definitely don’t want to be thinking of spacing!
I used my computer sheet as a guide for where to begin the first letter of each label. Luckily, this method embraces color more than perfection. If the label is not perfectly centered, it’s OK. As you’ll see, most things can be fixed or minimized.
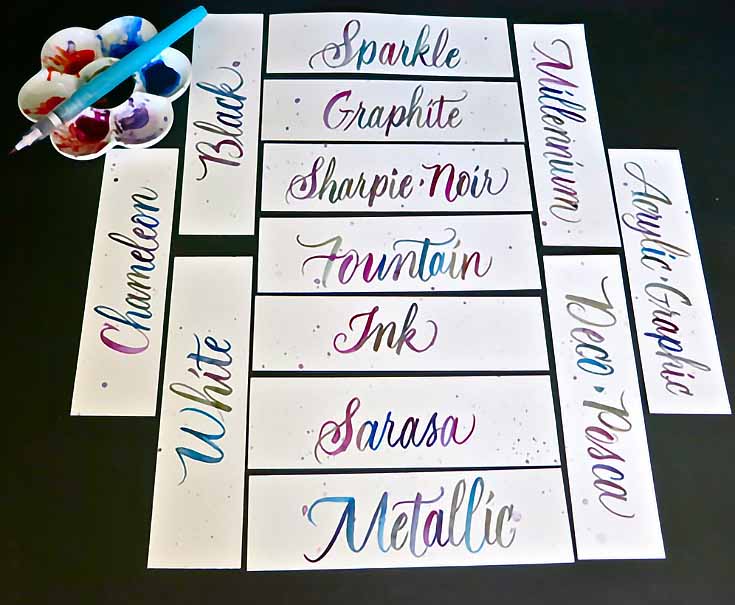
When I was finished with the list, I diluted the watercolor a bit and struck my brush lightly above the paper to splatter a little more color over the words. (You can test the splatter colors first on a scrap piece of paper if you like.) It’s basically a way to make watercolor confetti, and it keeps the eye from magnifying lettering inconsistencies.
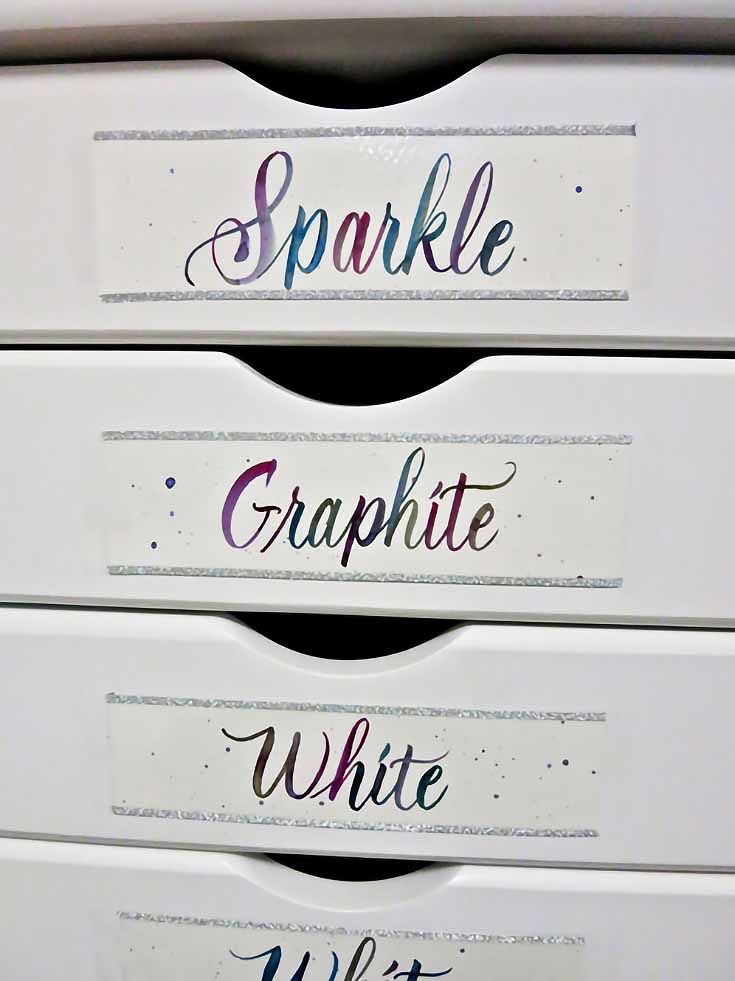
I trimmed the labels on my trusty Rotatrim, a well-used, 30 year-old trimmer that I couldn’t do without. My hand directs the black box as it travels over the paper, and the self-sharpening blade is underneath the box, making it the safest way to trim that I know of. This refined the sizes, making them all 7” x 2”.
I then turned the labels over and carefully put them face-down on the sticky side of 8”x 2” strips of packing tape. The tape protects my art and gives me a sticky edge of 1/2” on each side of the label to attach to the drawer.
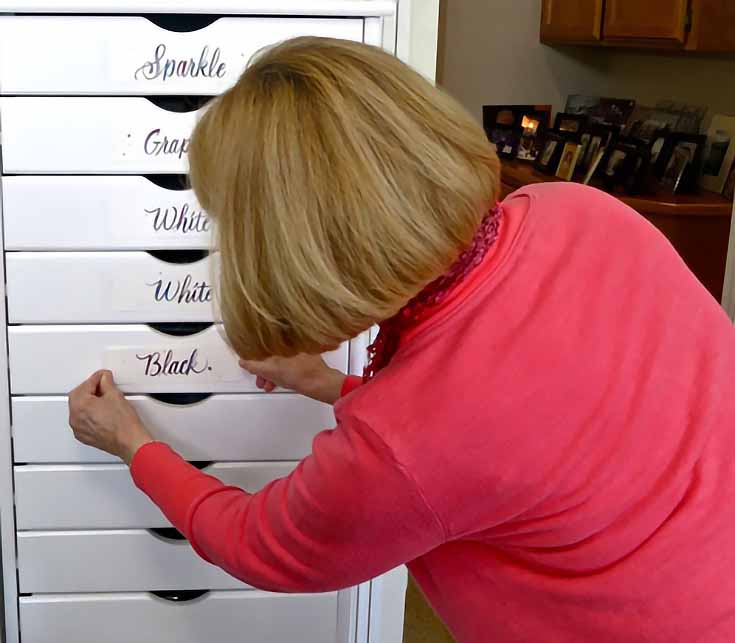
I attached each label to the chest. They would look lovely on other projects, as well.
Oh, and one more finishing detail! To hide the labels’ edges, I added a little strip of silver metallic, skinny Washi tape. Here’s a close-up shot of a few of the finished drawers.
Brush lettering is my most popular class. . . I just returned from Mendocino, California, where I taught this very technique. Upcoming classes are listed on my Facebook page under Events.
I hope you enjoy making some labels of your own with this technique. And if you’re in the area, feel free to join me sometime in one of my California workshops!
This post may contain affiliate links.