When drawing from life, I often see art students do their best to depict the eyes, nose and mouth as they see them on a model. . . forgetting, however, to first draw the overall construction of the head.
This is like decorating walls before ever building the house—and just like building a house, “building” the head in a portrait drawing requires some crucial knowledge of proportions and measurements.
So today I’m going to share with you the step-by-step method of drawing the head’s proportions as it’s taught in one of the World’s best art institutions—Repin Academy in St. Petersburg, Russia. I also describe it in my book on portrait drawing which is available on Amazon.
Here’s how the finished sketch looks:
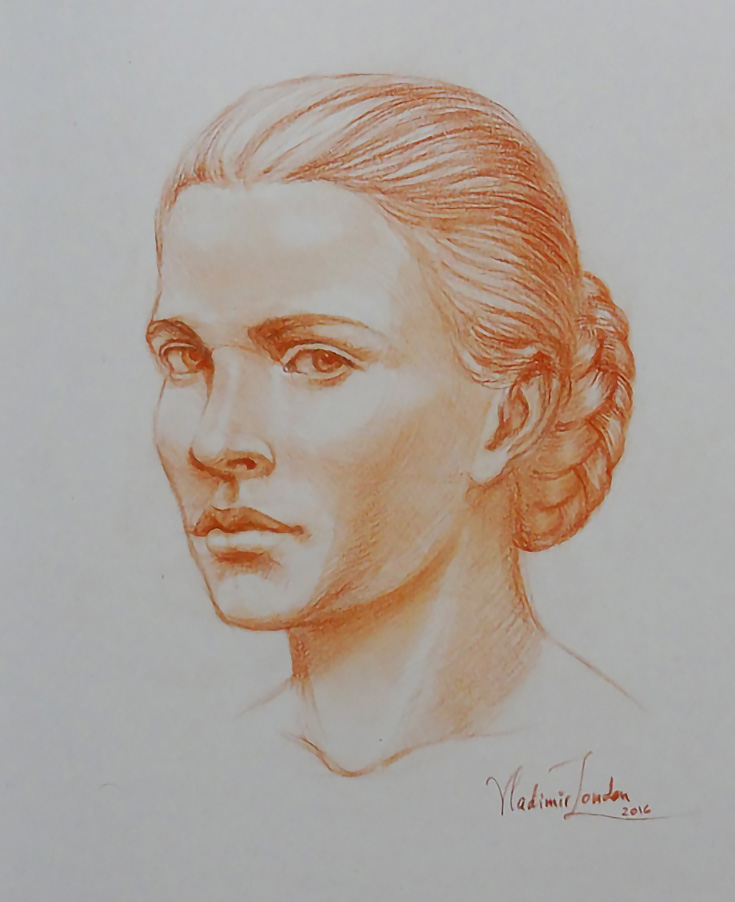
If you follow along with each of the tutorials in this series, you’ll be able to draw your own three quarter view portrait, just like this one.
NOTE: This quick drawing was done in red pastel pencil, but feel free to use any drawing medium of your choice. Today we’re focusing on constructive drawing principles, rules of perspective, head proportions and anatomy, which won’t change whether you draw in graphite pencil, charcoal or with your finger on sand.
Before you begin drawing:
I would suggest getting a model or drawing a self-portrait looking in a mirror. It’s always easier to draw accurately from life, rather than from your memory or imagination.
Analyze the head and choose a viewing angle. (For the purposes of this series, find a three quarter view similar to the one in the sketch above.) Fix your paper to a drawing board and get your pencil sharpened—you’re now ready to begin.
1. Marking the proportions of the head
Begin by measuring the main proportion of the model’s head—in other words, its width-to-height ratio—using a pencil, or by eye.
NOTE: Many art students ask me how to measure with a pencil. To answer, I created this article: http://drawingacademy.com/how-to-measure-with-a-pencil
The proportion of a head varies depending on the viewing angle, so take your time and make sure to get it as accurate as you can. When you know its ratio (how tall the head is compared to how wide it is) draw your first four strokes on your paper.
These four strokes will indicate the top, bottom, left, and right edges of the head. Make sure there is enough space in front of the head—what we call “nose room”—and that the head is not too close to the top edge of paper. It is also good to have more space below the head than above.
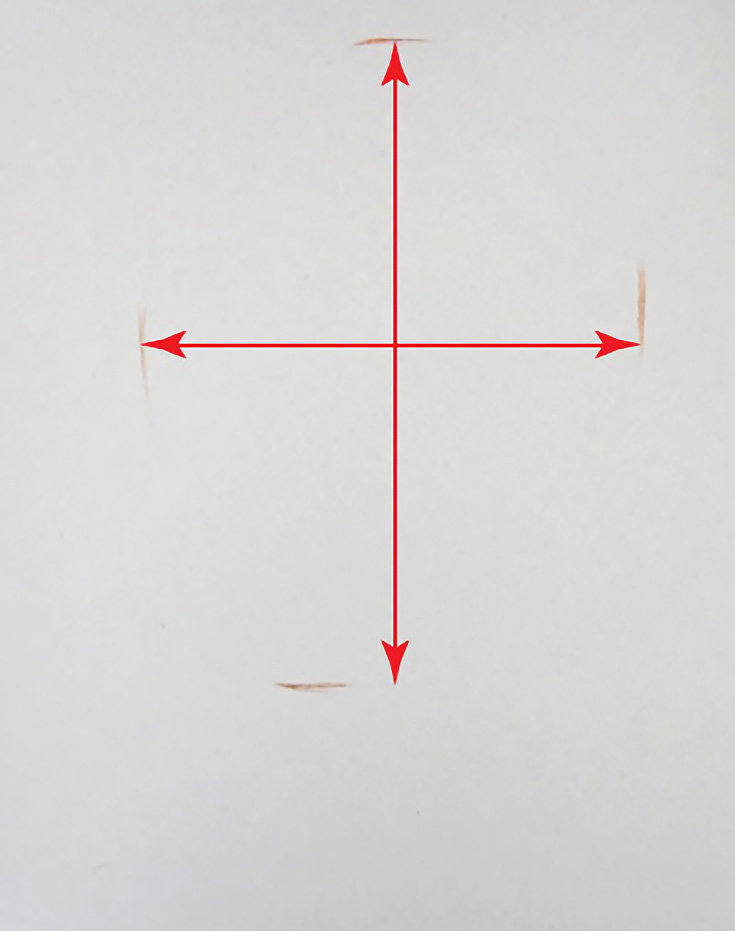
You can train your eyes to judge proportions by first marking those edges freehand and then, if necessary, double-check the proportion using your pencil as explained in my article above.
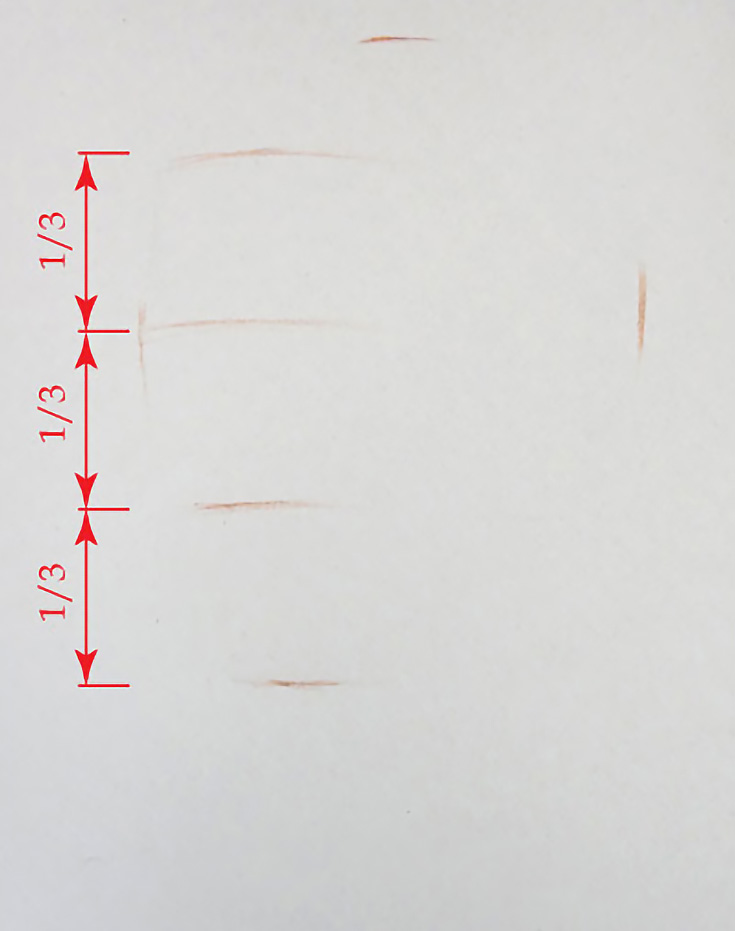
2. Dividing the face into three parts
The next step requires some knowledge of the universal proportion of the face—all adult faces (regardless of individual appearances) can be divided into three equal parts:
• From the hair line to the eyebrow line
• From the eyebrow line to the base of the nose
• From the base of the nose to the bottom of the chin.
Observe on the model (or your own face in the mirror) where the hair line is and mark this line on the drawing. Divide the distance from that line to the bottom of the head into three equal parts by eye or using a pencil as a measuring stick.
Do this as accurate as you can—precise location of these three lines will help you to place each facial feature correctly.
As you may notice, if the model’s head is at the same level as yours, each of those lines will be exactly horizontal. When the model’s head is located higher than yours, those lines will curve upward. The opposite is also true—those lines will curve downward when a model’s head is located lower. The curvature depends on your viewing angle.
To keep things simple for this exercise, try to draw your portrait at eye-level so the lines are all exactly horizontal.
3. Placing the eye line
Placement of the eyes is another universal truth for all portraits—the eye line always divides the height of the head in half. So you can place this line with confidence, marking it freehand or using a pencil to measure where the middle of the head is.
This line, of course, will be located below the eyebrow line that we marked in the previous step.

I should make a disclaimer that the eye-line can be tilted or curved, again depending on your viewing angle. This can foreshorten the distance between the eyeline and the top or bottom of the head, which in some cases will make the eye line appear lower than the actual mid-point of the head.
In our drawing, however, the subject’s head is at the same level as our own, so the eye line will be horizontal and exactly half-way between the top and bottom of the head.
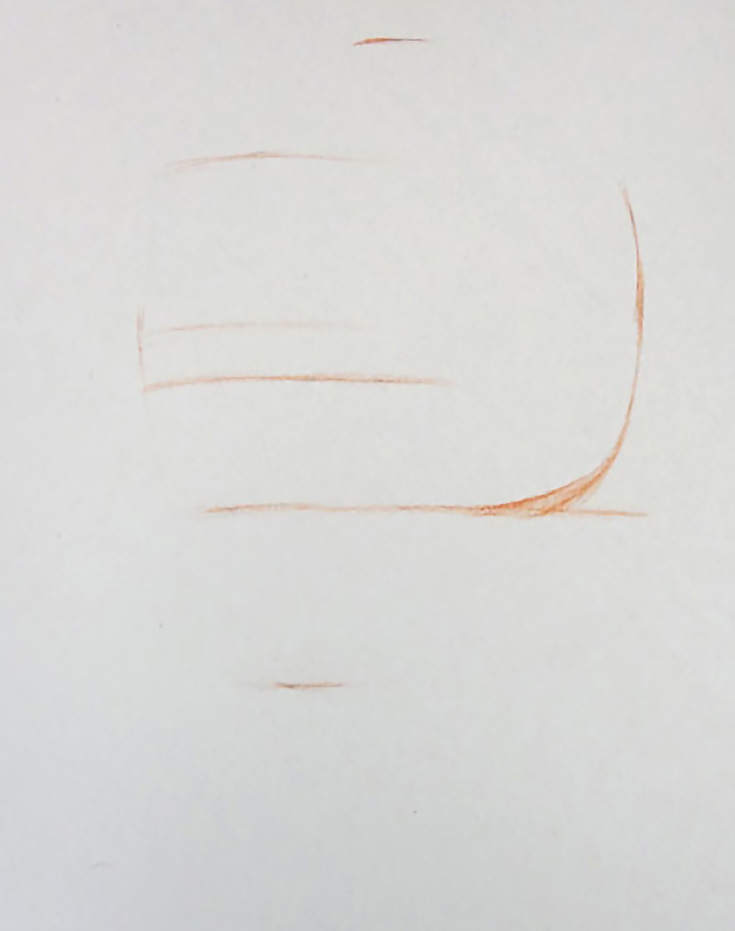
4. Locating the base of the skull
Locating the skull base will help us to connect the head, neck, and shoulders correctly. Even if you can’t see the back of the head, the base of the skull should be on the same level as the base of the nose, which is one of the original 3 lines we drew to divide the face into 3 even sections.
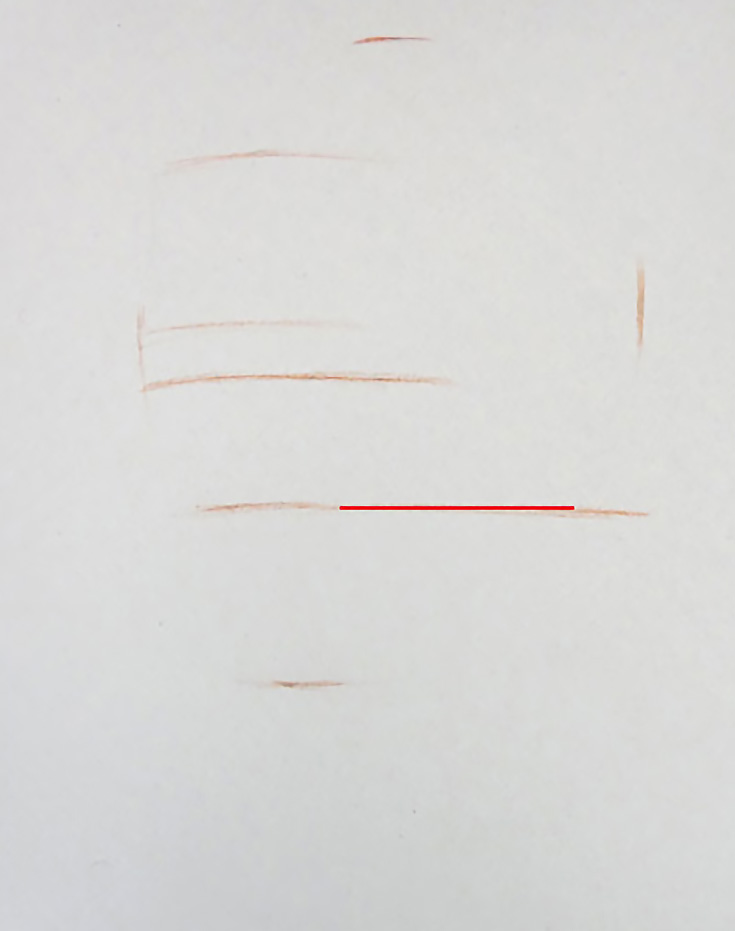
I’ve emphasized that line in red, above. As you draw this line from the base of the nose to the back of the head, you’ll be drawing right along the bottom edge of the cheekbone.
5. Drawing the curve of the cranium
In this step we’re simply marking the location and curve of the lower part of the cranium. Although it might be hidden by long hair or a tall collar, we draw it anyway, to help us build the shape of the head before drawing the features on top.
Just imagine that the head is transparent, in the meantime.
Later on, we will connect the neck muscles to this part of the skull, so knowing where it is will be very helpful.
Check out Part 2 in this series, also on EmptyEasel!
Special thanks to Vladimir London for sharing his drawing expertise and this tutorial. Vladimir is a published author and founder of the Drawing Academy, an online class for learning traditional drawing techniques from home—make sure to click through for full tutorials, drawing tips, and more!
This post may contain affiliate links.