I’m all for saving time in the kitchen! And I love bringing creativity and beauty into my space. So today I want to share a little tutorial on making artistic labels for your frozen meals, jam jars, and assorted kitchen canisters.
Even with just the two of us now, I aim to cook fresh, healthy meals—but please, not every day. Often this means doubling a recipe and freezing portions that can be quickly defrosted at a later time. I most often freeze breads, soups, sorbets, and pizza or pasta sauces.
Here’s how I keep everything straight:
Labeling frozen meals
I start by finding the perfect food photos from FreeFoodPhotos.com. This is a Creative Commons site so the photos are not only free, they’re very nice! You’ll probably find just what you’re looking for there.

Place your photos 6-up in a Word document, print out on copy paper, and hand letter the name (this is Banana Blueberry Bread, but space only allowed for “Banana-Berry”). If you like, add the date.
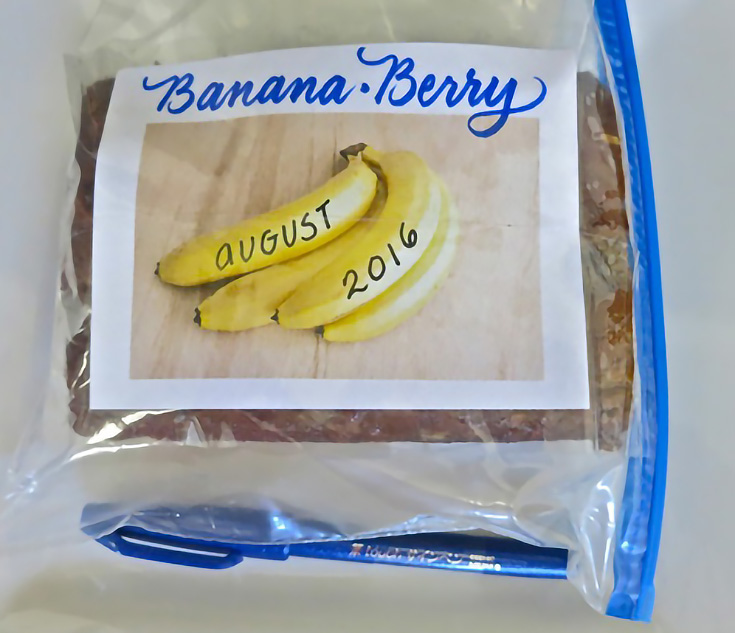
(I used a Pentel #touch marker here.)
You can save the undated document in your Food Folder on your computer and use it again and again. Then, just trim and attach the label with packing tape.
Making cute jam jar labels
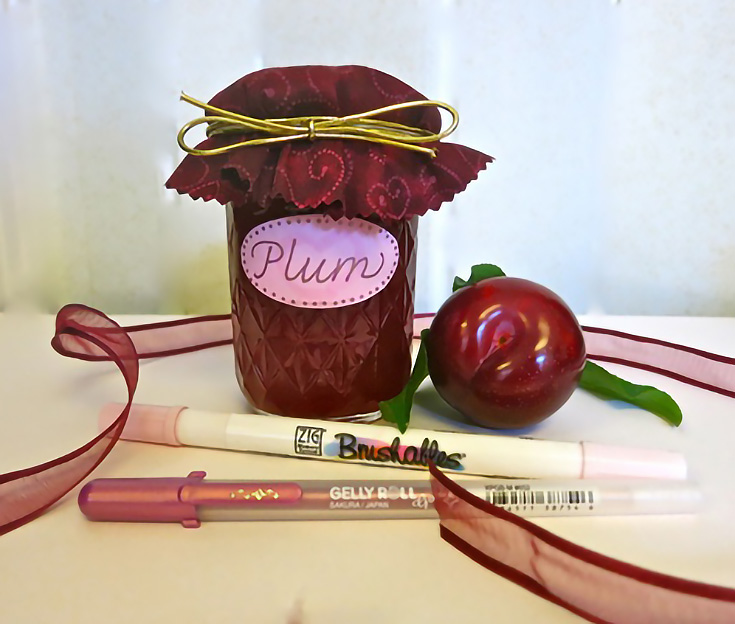
At the peak of summer fruit production, it’s fun to make jam—and even more fun to make labels to decorate the jars.
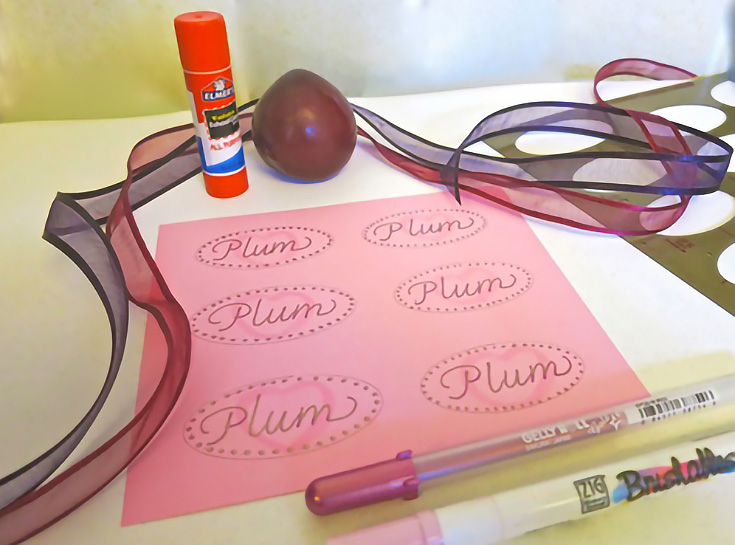
Start with an oval template, (mine are hundreds of years old—glad I didn’t toss them!) on plain pink copy paper. Use brush markers to create a light plum illustration in the background, and the word “Plum” in front. I bordered mine in pink/gold dots.
Attach the label with a glue stick (you could also use packing tape) and voilà!
Organizing your pantry essentials
In my pantry, labels help me organize and identify the staples. And I like the freedom of labeling the cannister in a non-permanent way; it gives me the option of later changing the label.
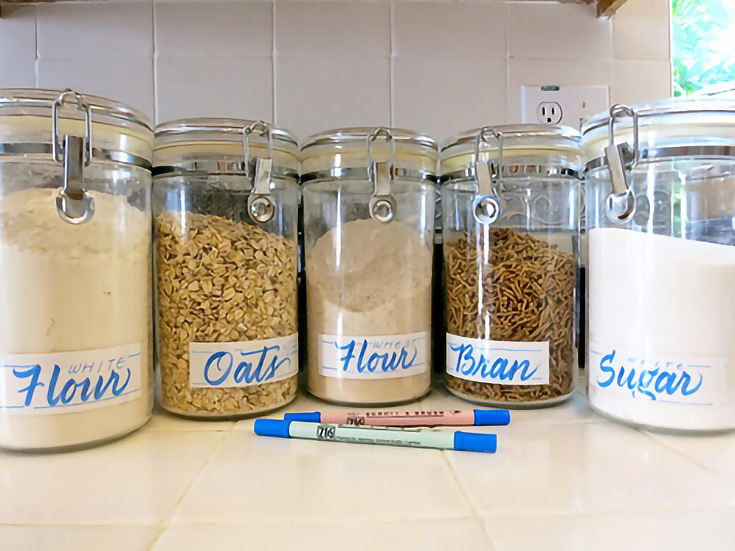
For these, I also used brush lettering on copy paper. Any markers such as Tombow, Pentel #Touch, gel, or Zig bullet points will work nicely.
Just don’t use watercolor paper! It will not bend like a nice quality copy paper, and it will ruin your markers. Plus, it’s too expensive for this assignment.
I hope you’ve enjoyed both projects so far in my Calligraphy in the Kitchen series. You can still download the free Champagne Jam recipe at my Facebook page, Calligraphy and Designs by Phawnda.
Check back for the third project in this series soon! Thank you for your support!
This post may contain affiliate links.