Are you trying to get delicate colors, values, and gradations in your colored pencil work with no success?
Maybe it’s time to try drawing with tissue paper.
I started using this technique after reading about an artist who used tissue paper to apply colored pencil to his portraits (namely for drawing perfectly smooth skin tones). He was able to create the softest, most natural looking skin I’ve ever seen in colored pencil portraits—and he did it with tissue paper.
It could be just the solution you’re looking for.
First, let’s discuss “applying” vs “blending”
To be clear, instead of drawing with your pencils and trying to blend those pencil marks with tissue paper, the technique I’m demonstrating today uses tissue paper to actually apply the color to your surface.
This produces smooth, seamless color—and zero pencil strokes. Your individual layers of color are so thin and transparent that you can achieve delicate gradations in color and value that are nearly impossible in any other way.
Drawing with tissue is time-consuming, so it’s best used in isolated passages, or places where smooth gradations in color and value are absolutely necessary. Possible uses include drawing clear skies, skin tones, or luminous flowers.
What you’ll need:
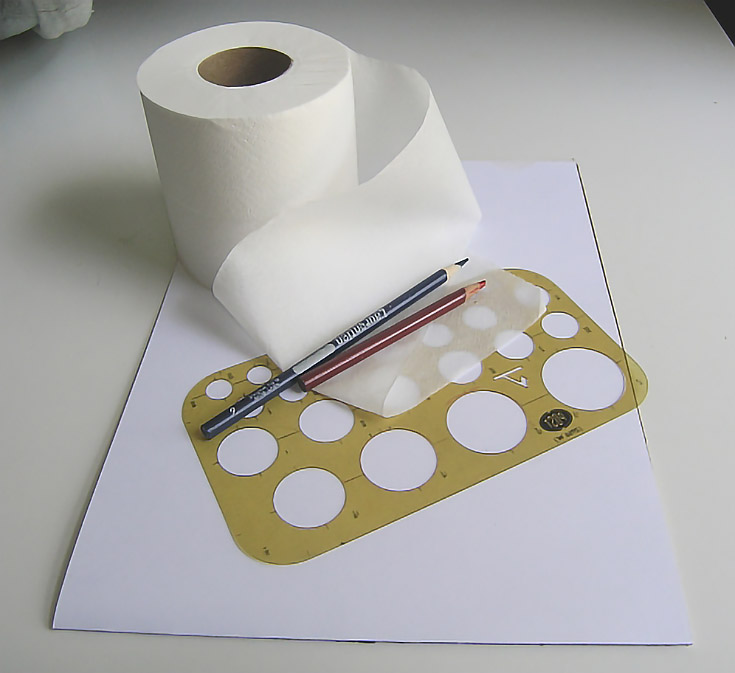
Tissue paper – Use tissue paper that does not contain lotions or similar additives. Both facial tissue and bath tissue will work. If you’re not sure which facial tissues are 100% lotion-free, use bath tissue instead. You’ll need at least enough to fold around your index finger.
Drawing paper – Your drawing paper should be smooth and soft (without a lot of sizing). Rising Stonehenge or Bristol Vellum are good possibilities, but any smooth or ultra smooth paper should work.
I used Bristol Regular for today’s example illustrations and while it worked for this demonstration, was a little too hard to accept a lot of color. I’d go with something softer for even better results. If you’re unsure, do a test swatch first.
Colored pencils – If possible, choose pencils that are soft, such as Prismacolor Premier pencils. This will help more than anything else.
All right, let’s get started!
Step 1: Make a palette
Take a piece of scrap paper to use as your “palette” (just like a watercolor palette).
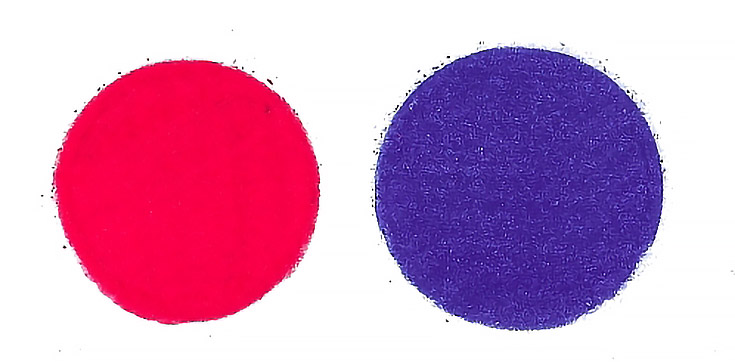
On your scrap paper, make several swatches of colors that you’ll be using in your drawing. Use heavy pressure and multiple layers for each swatch of color. They should all be large enough (and spaced apart enough) so you can “lift” color from them with your tissue paper without getting into other patches of color.
NOTE: I created a circle template to speed up and standardize my color swatches. This let’s me make my palette quickly and easily each time. However, you can also make your palettes free hand if you prefer.
I’d recommend a minimum of two inches, with a margin of at least half an inch between each color.
Step 2: Prepare your tissue paper
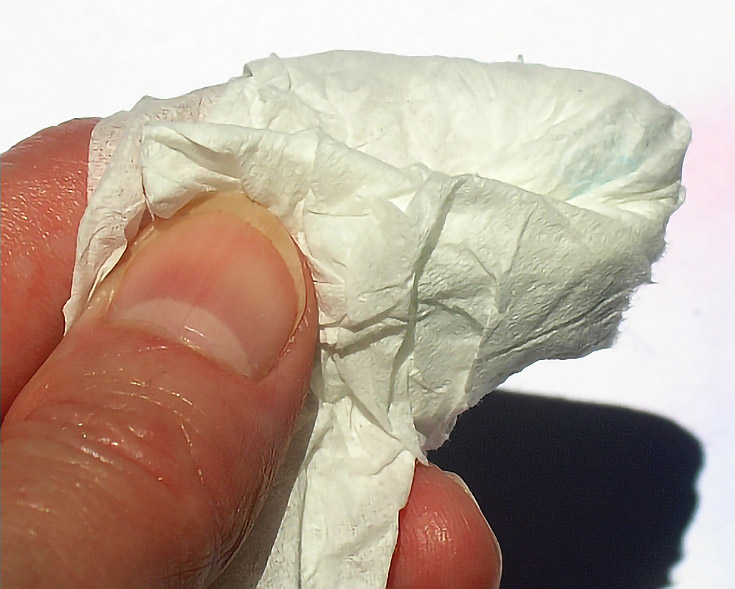
Fold a piece of tissue around your index finger so that the tip of your finger is encased in tissue. It doesn’t need to be neat. I found that the folds shown below were better at picking and laying down color than smooth or flat tissue.
Step 3: Apply color with tissue paper
Rub your tissue-covered finger over the color you want to use. A circular pattern is best for this because it picks up the most color over the largest area of your fingertip.
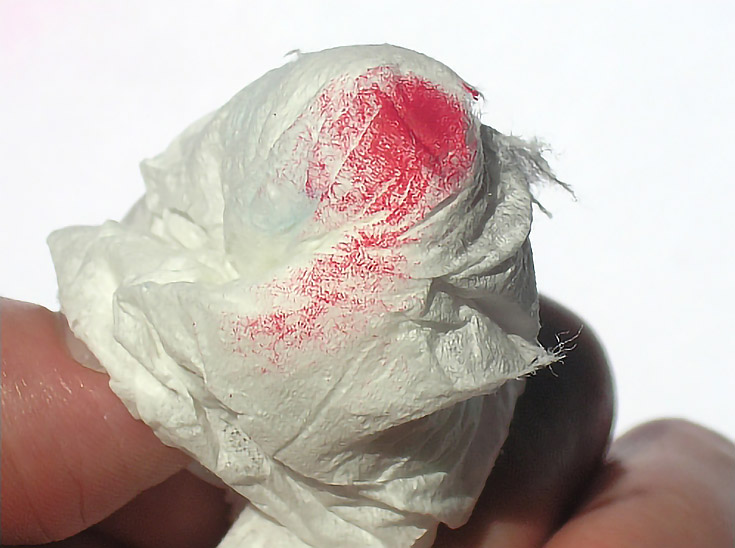
Even if you use heavy pressure, you’re not going to pick up a lot of color. This is about average. I know it doesn’t look like much but it is enough.
Next, rub the part of your drawing where you want to put color. You can use a variety of strokes for this, depending on what you’re drawing. As a rule, however, broader strokes and circular strokes work best.
If possible, stroke around the contours of your subject. If you’re drawing a face, imagine running your fingers over your subject’s face. Don’t be afraid of using heavier pressures when applying color. Even with the heaviest pressure, you won’t be able to lay down dark colors quickly. Building color is a layer-by-layer process.
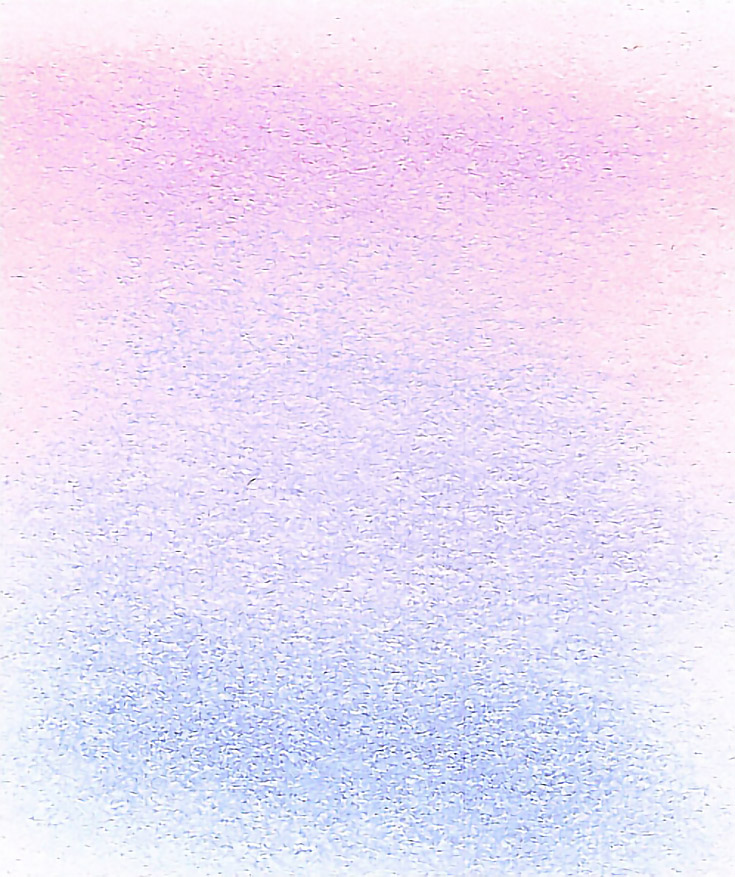
I used a back-and-forth stroke to rub color onto the paper. I used heavy pressure at the top and decreased pressure as I worked downward. I also went over the swatch several times and picked up color from the palette each time.

You can use the same piece of tissue paper for successive colors, but you’ll have to be very careful to work from light to dark when doing so, because each color you add will be affected by previous colors.
This is where working with tissue really shines. Notice not only the smooth, seamless gradations in each color, but the way the two colors blend. There are no edges and no pencil strokes.
Of course, if you’re looking for a faster method, you CAN always use your colored pencils like normal (use the side of a well-sharpened pencil for fewer noticeable pencil strokes) and then fold a piece of tissue in a small, dense, square to blend the color.
I guarantee you’ll still see traces of pencil strokes, but it will be quicker. That may be an acceptable trade-off depending on what you’re drawing.
Regardless of your method, drawing with tissue paper always takes more time. It can be successful with larger drawings, but it’s probably most productive in adding accents of incredibly smooth color, or in isolated areas.
And if you’re trying tissue paper for the first time, I suggest starting with a smaller drawing or maybe even experimenting with it on scrap paper using just 2 or 3 colors. That way you’ll get a feel for how it works.
Enjoy!
This post may contain affiliate links.