I’m a watercolorist and have been painting since the mid 80’s. One of the hardest concepts to grasp as a beginner was WHY I would want to stretch watercolor paper.
For a little background, my very first watercolor class was at a craft store. That instructor didn’t bother to stretch paper and most of us were using watercolor pads like these in order to save money on materials. I fell in love with watercolors, though, and for many years, never even looked for more instruction.
Finally, however, I enrolled in a community college art class that went into a lot more detail, including the various properties of different watercolor papers, and the benefit of “stretching” watercolor sheets, especially 90lb (student grade)and 140lb (artist grade) watercolor paper. It was like a light bulb went on in my head. . . stretching keeps it from buckling when painting and applying water!
I know, I know, many watercolor artists don’t bother doing this but over the years of painting, I feel it’s well worth the time and effort. Because somehow, you will have to get that painting flat, otherwise it will “buckle” under the mat and glass.
So here’s what I’ve learned about stretching watercolor paper:
1. Pick a good surface to stretch your paper on
There are lots of options to choose from, but I believe I’ve found a clear winner.
Some painters use wood boards like particle or plywood to stretch their paper, but that can be problematic since you’ll want to staple the paper onto them. Regular staples won’t go all the way into the board to hold the paper, and heaver staples are nearly impossible to take out when you’re done painting.
After struggling with wood and other surfaces, I finally came upon Gatorfoam board, which is sold at most art stores. It’s basically a half-inch foam core with tough surface, thus the name “Gatorfoam.” Because of the surface, regular staples go straight in and hold your paper firmly in place.
Even better, watercolor sheets are typically 22″ x 30″ and the makers of Gator board manufacture their product an inch bigger. Smart, huh?
Typically I paint on half sheets and quarter sheets of watercolor paper, so I cut one Gator board in half, and one of the halves into quarters. That gives me a a perfect-sized surface no matter which size I’m painting on.
2. Soak your paper before stretching
The first step in stretching watercolor paper it is to soak each sheet in a tub of cold water. Fill the tub with just enough water to immerse the paper so it floats, then let it soak 5-10 minutes, making sure it is totally saturated.
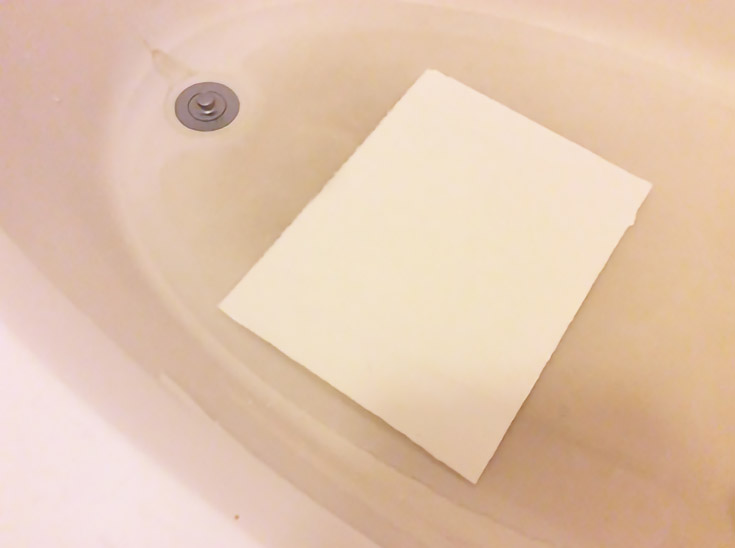
When it’s done, pick up one corner and then grab the next, holding it over the tub to let the excess water drip off. Lay the saturated paper evenly onto the gator board. You may need to slightly lift each side or corner to remove any air bubbles.

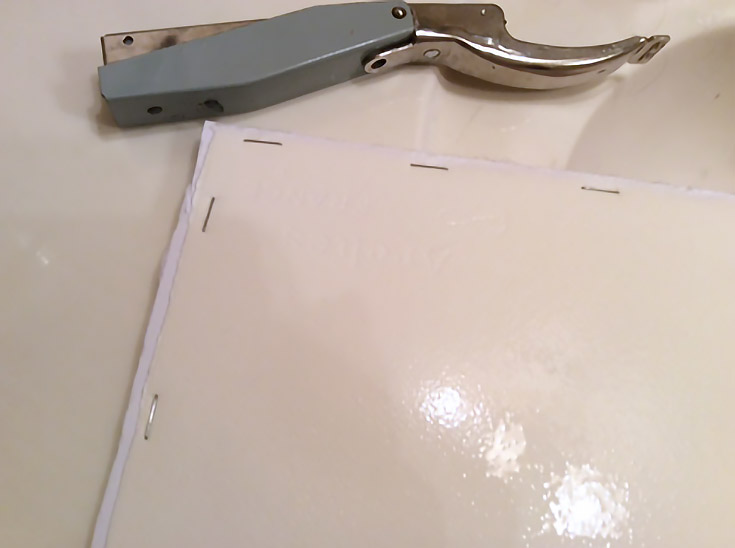
3. Staple your paper to the Gator board
Staple the paper securely onto the board, placing your staples about about a quarter-inch in from the outer edge of the paper. Your staples should be around 2 to 2 1/2 inches apart.
4. Allow the paper to dry
Let the stapled sheets dry on a flat surface in a dry room. Try using the top of the washer and dryer, or if you have room, any table top will do.
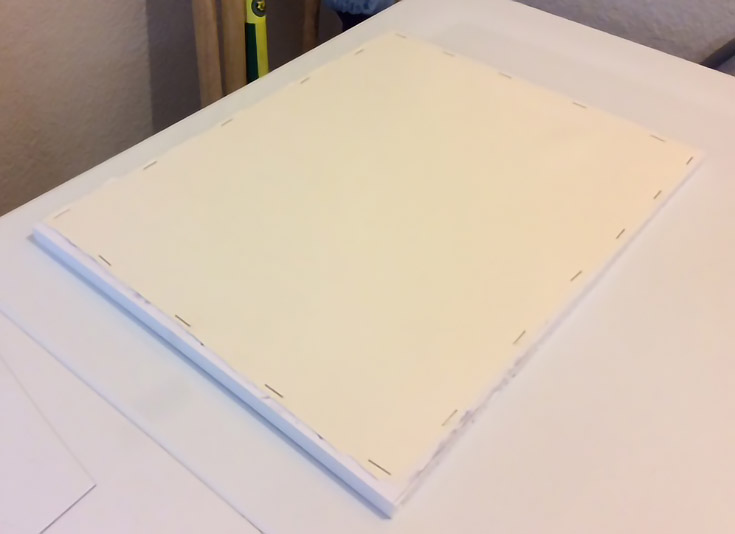
Avoid drying with a hair dryer. . . your paper should dry naturally.
5. Paint!
Once the paper is dry, paint your masterpiece! When you’re done painting, again let your paper dry. It will easily pull off, staples and all, which can easily trimmed off with scissors (as long as you leave a little room while painting).

Special thanks to Barbara Tibbets for sharing this article! To learn more about Barbara or her work, please visit her website.
This post may contain affiliate links.