One way to create great visual texture in your artwork is by placing your paper on top of texture that you find in real life, and roughly scumbling over it to transfer that texture onto your paper.
Today’s article will be the first in a series on using various “found” textures from around my studio and house. I’ll begin with the wood flooring in my entryway.
Classic wood floor texture
Our entry flooring is narrow slat wood. Each slat is 2 to 3 inches across. It’s not highly polished or waxed, so it has a worn, almost antique appearance.
The grain is also quite deep and the separations between the slats and where they meet end to end are pronounced in some areas. It’s an excellent texture for use with colored pencil.
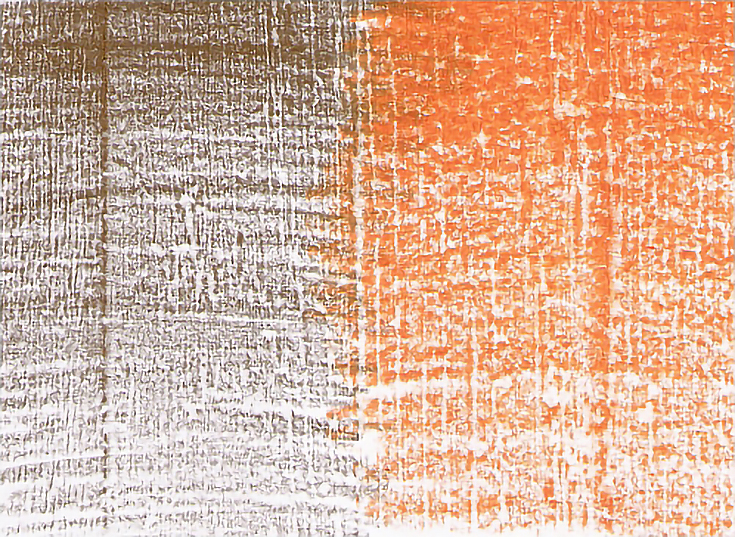
To create this texture, I made sure there was no dirt or debris on the floor, then placed my paper against one of the separations between slats. I used two different colors to duplicate texture by working across the grain. At the top, I used heavy pressure and multiple layers. The bottom of the example shows the lightest pressure.
I started with slightly dull pencils and didn’t sharpen them. You can use sharp pencils, but if you’re working over a rough grain or using heavy pressure, a sharp pencil is likely to break, possibly causing damage to the paper.
To make a more even layer of clor, use the side of the pencil.
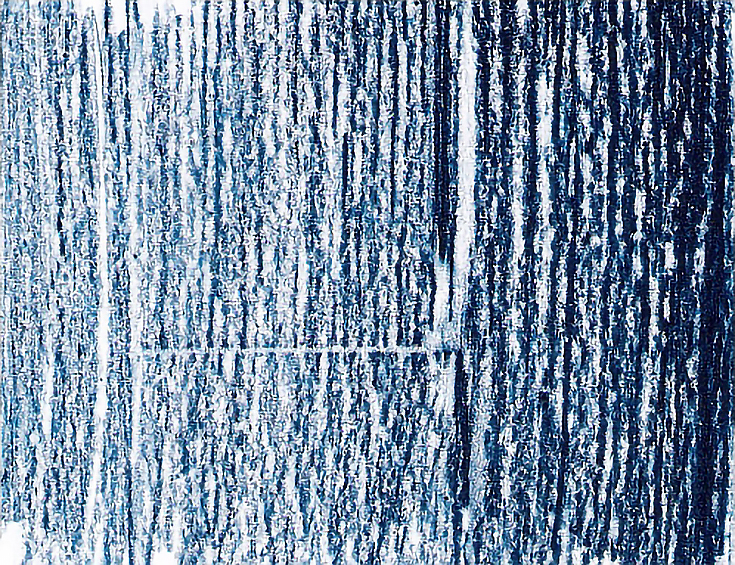
For this example, I used the same area of the floor and positioned my paper in the same manner as above. But instead of stroking against the grain, I stroked with the grain. Again I used a blunt pencil, but this time, I held the pencil in a vertical position. This enhanced the appearance of grain. Using heavy pressure on the right and lighter pressure as I moved to the left also created the illusion of a rounded form, even though the floor is flat.
Varying pressure and layers affects the type and degree of detail. Use light pressure and one or two layers to create a “suggestion” of texture. Heavy pressure and many layers will create more dramatic texture and create a pattern that is almost a negative of the pattern you’re copying.
I also used only one or two colors in each of these examples. Add multiple layers while transferring texture for even more interesting results.
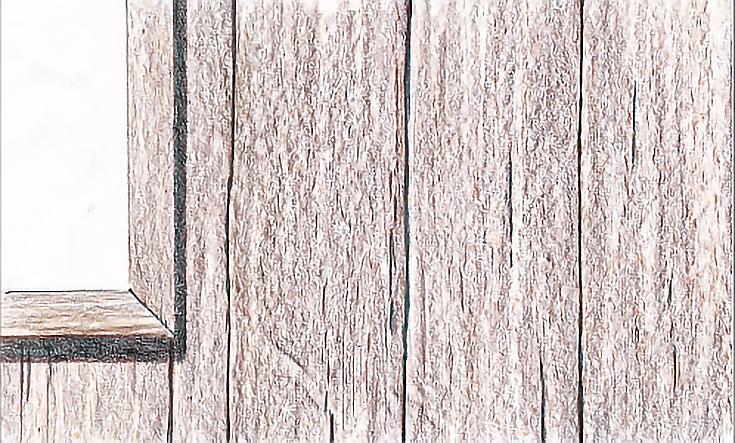
Possible use #1 – Wood panel wall
I started this quick sketch by drawing a simple wooden window frame on the left side of the paper.
After that, I placed the paper on the floor over the textured wood. I used the side of a French Grey 50% pencil and began transferring texture for the vertical frame and walls. I then turned the paper sideways and shaded the bottom portion of the window frame—which gave it the correct angle of wood grain.

I followed up with Raw Umber, also applied with the side of the pencil and light pressure.
Once the basic texture was in place, I glazed Sand and Dark Umber over the entire drawing. I worked on a smooth surface to create a solid, even layer of warm color. In the cast shadow and cracks, I used the tip of the Dark Umber and medium to heavy pressure to darken the values and add contrast. Finally, I used Indigo Blue and medium to heavy pressure to further darken the shadow and cracks.
If I wanted to develop even more realistic textures and colors, I would simply continue to add layers of color and value.
Possible use #2 – Wood fence
In this sample, I created the texture with a dark gray pencil and medium pressure without first drawing in the shapes. Holding the pencil nearly horizontal to the paper and using a straight edge, I stroked across the paper in the same direction as the wood grain on the floor. Two or three strokes for the top rail and two or three more for the bottom rail.
To draw the post, I turned the paper 90 degrees and used the same method.
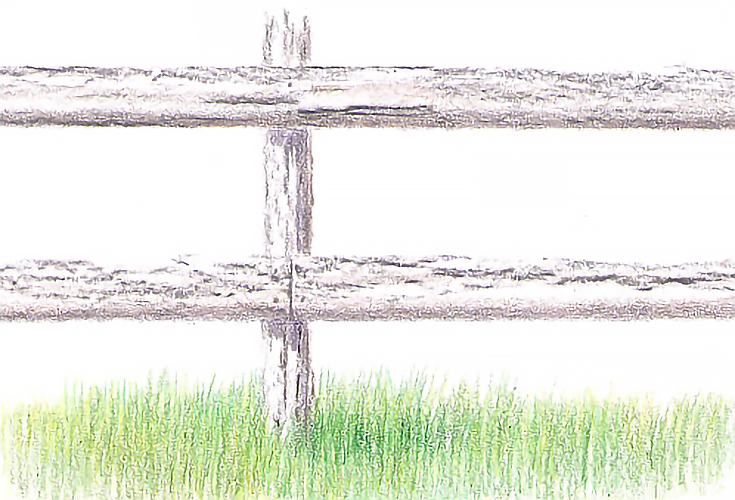
I then used a couple of browns and another gray to add flat color and a few more details, including shadows and mid-tones. A handful of greens and short vertical strokes to add the grass and the illustration was done.
If I were using this method to do fencing in a painting, I’d continue to add detail, including deepening the shadows and mid-tones, until the fence fit into the rest of the composition. Of course this sketch is still very basic, but it’s an excellent way to establish a fence in just a few minutes. (It took less than 15 minutes to create this illustration, which measures about 8 inches by 3 inches.)
Final tips for transferring textures to paper
The thinner your paper, the more easily texture will be transferred. I use a high quality, 24 pound laser and ink jet paper for the illustrations in this article. Such paper may not be archival so shouldn’t be considered ideal for most artwork, but it takes color well and is extremely good for transferring texture.
Always check to make sure the textured surface is clean before starting. You may want to consider placing a sheet of onion skin or tracing paper between your art paper and the surface from which you’re transferring texture to keep the art paper clean and/or to mute the transferred texture.
Be careful if trying a new texture for the first time on an important piece of art. This is where I’d definitely recommend using the laser and ink jet paper I mentioned above, just to make sure you know how the texture will transfer before committing to it.
Have fun and experiment. You’ll never know what textures might work until you try them.
Good luck!
This post may contain affiliate links.