Painting A Jar And Two Nectarines – My Step By Step Watercolor Process

Published Sep. 16th 2011


During a recent still life painting I took some photos to show how I go about my painting process. I’m sure many of you probably do it differently, but that’s the great thing about painting—you can almost always learn something from seeing how someone else does it.

First off, I do my drawing, of course. I didn’t take a photo of that step, but a good drawing always helps the painting go more smoothly.

I then applied some masking fluid to all of the areas that I wanted to keep white. Once the masking fluid dried, I started with the nectarines and gave them a quick wash of watery red.

Jar-step02

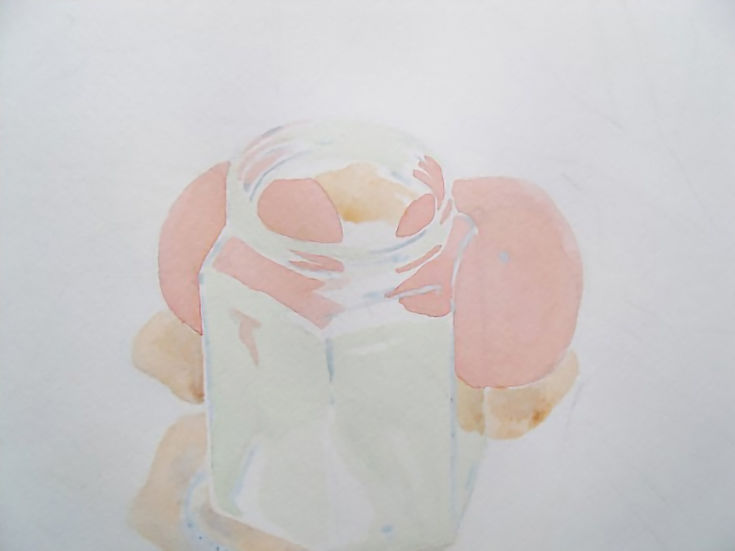
Around this time I also painted in the warm shadows cast by the fruit and the jar, and put some light green into the glass.

In the next step, I defined the jar quite a bit more. I mixed a dark blue-green colour for the darkest parts of the jar (usually found on the edges and corners, where the light doesn’t pass through as cleanly) then diluted that same colour by adding in some water, and used that for the middle-value green of the glass.

Jar-step04

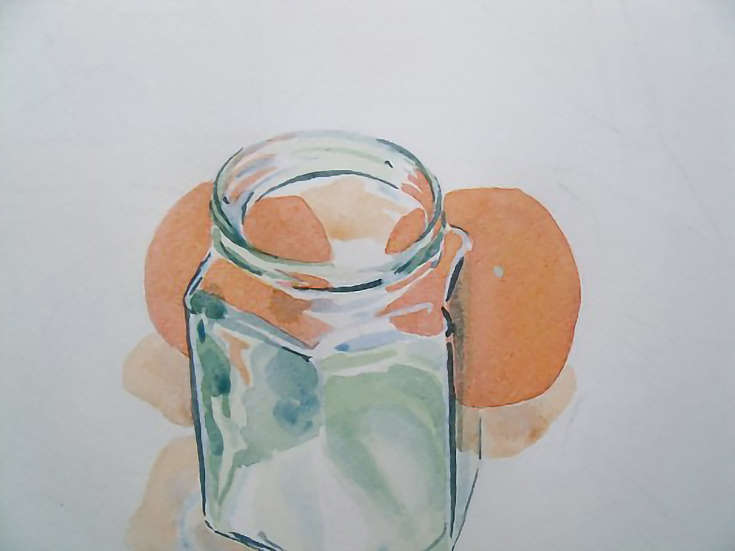
I also put an orange wash over the nectarines, and even added some blue dabs to the left side of the jar where some additional colours were reflecting in the glass.

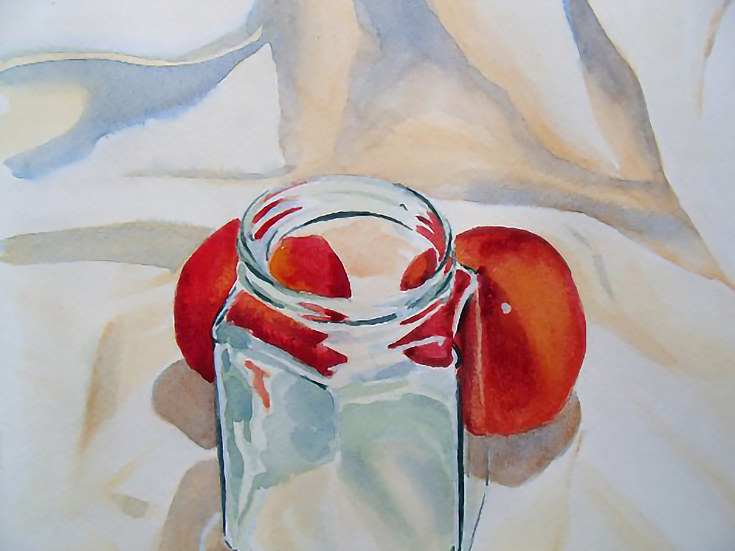
At this stage, I felt like the background needed some colour, so I painted in a splash of tan colouring in the background next to some blue. In hindsight, this was a bad move.

But, leaving that mistake to deal with later, I added some pizazz by painting in a nice bright orange on the nectarines, followed by some red.

Jar-step07

With the nectarines completed I tried to repair the background by adding some more tan/brown to it. . .

. . . until I finally admitted defeat on the background and peeled off the masking fluid.

Jar-and-two-nectarines

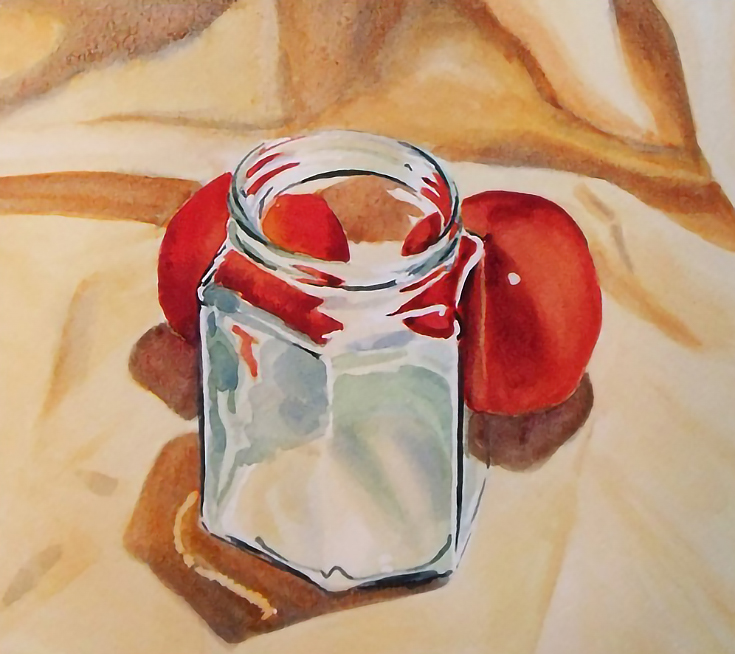
I do like the jar and the nectarines, but I wish I had just left the background with some pale blue washes.

Ah well, you live and learn. :)

For more from Ronnie, please visit his website at ronnietucker.co.uk.

Did you like this article?
Please stumble it so others will find it or check out the related posts below.
Finally, my "big project" is finished! It’s been a crazy day with a lot going on, but foliotwist.com is finally live and online! Since I’ve kept it a complete secret up until launch, here’s a quick (mostly visual) overview of what it does. . .read more
Sometimes it’s fun to use a painting strategy that's foreign to our usual approach. It refreshes the mind, recharges the brain and might open a creative thought or kindle a new direction in your art. In today's tutorial I’m going to show you how to use a basic Notan composition as a painting s. . . read more
In the following soft pastel demonstration I'll be taking you through my process for painting the female figure. I hope you enjoy it! My supplies: I used a double sheet of Canson Mi Tientes pastel paper, in a warm grey colour. (I prefer to work on the smooth side, but I know many pastelists wh. . . read more
Every watercolor painter should know how to properly apply color washes to their paper. In the following video, Susan Bourdet shows the entire process, starting with a preliminary drawing that has already been protected with masking fluid. Susan explains how to mix several colors of paint in p. . . read more
"Watercolor batik" is an amazing technique that combines melted wax and watercolors on rice paper to create an exciting-looking painting. Today I'll be explaining how I use this technique in my own paintings. If you're ready, let's get started! First, I ink in my drawing on rice paper—which is. . . read more
Stay current.
Subscribe to EmptyEasel's free weekly newsletter for artists. Sign up today!
CanvasFlyer
Art Contests
More art contests. . .
EE Writers
Alyice Edrich Cassie Behle Steff Metal Zach McCabe Carrie Lewis Aletta de Wal Luke Montgomery

Want to be a writer for EmptyEasel? Paid positions are available, and the perks are great! Contact us to apply