Collage (pronounced ko-lahj’) simply means pasting or gluing papers or objects onto a surface. Its name is derived from the French word coller, meaning “to paste” and was first used as a fine art medium in the early 1900’s.
When we think of collage today, we might think of the beautiful picture books from our childhood, like Eric Carle’s The Very Hungry Caterpillar where he links learning with beautiful collage illustrations.
In our adult life, however, we can use collage to stretch our art to another level and join Braque, Matisse, and Picasso to produce unique pieces of art. Originality comes from using our own photos and hand-painting personal pieces of paper to create our own, individual style.

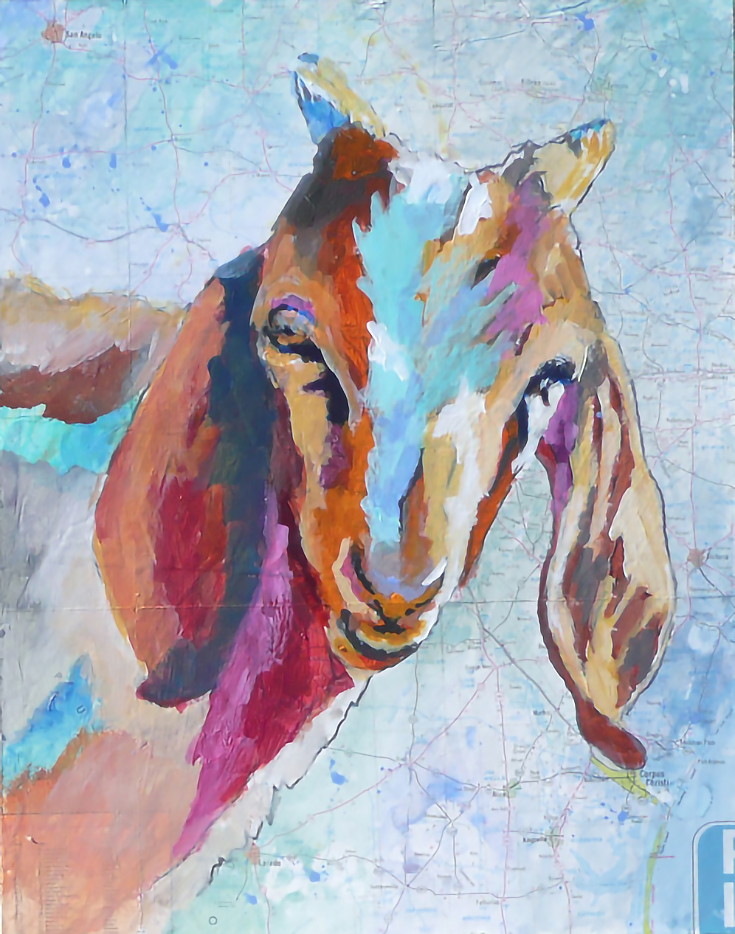
So today, instead of letting your acrylic painting be the finished product, consider using it as the foundation for a mixed media/torn paper collage (like my Texas longhorn collage shown above).
Here’s my collage process
1. Start by choosing a support
You can use canvas, board, or anything else you’d like. The longhorn collage I made is on a 16″ x 20″ piece of MDF board that you can find at any local hardware store. Ampersand Gessobord could be used also.
2. Attach a map for a background
I brush over it with Liquitex Medium and Varnish or Soft Gel medium and let it dry, which adheres it to the support. Any other image or graphic would work too, or you could paint your own background instead.
3. Add your design in dark pen
Create basic shapes, a figure, movement, or your own abstract composition over the top of the map.
4. Loosely paint over the top of your design
This helps you to get an idea of values and colors where the basic collage will be placed. Also it’s good to have some analogous color behind the collage if you miss an area.
5. Start arranging your collage elements
This is the fun part. . . start hand painting some papers, or use found papers that correspond to the colors and shapes of your composition. Found papers might include magazine pages, vintage stamps, song books, old book pages, children’s story books or other paper ephemera such as ticket stubs or an individual’s handwriting.
I like to hide hidden messages in my collage paintings. In the longhorn collage, I used the words “Tumbling Tumbleweeds” cut from some sheet music. You can also use rubber stamps to stamp on the paper and decorate with multiple layers of acrylic paint (tube, folk craft paints, or liquid acrylic works).
6. Adhere your collage
Use the same Liquitex medium as before to glue down the papers. Just put some medium down on the support with an old brush, place the paper down and then cover it with the medium and continue until the image is covered.
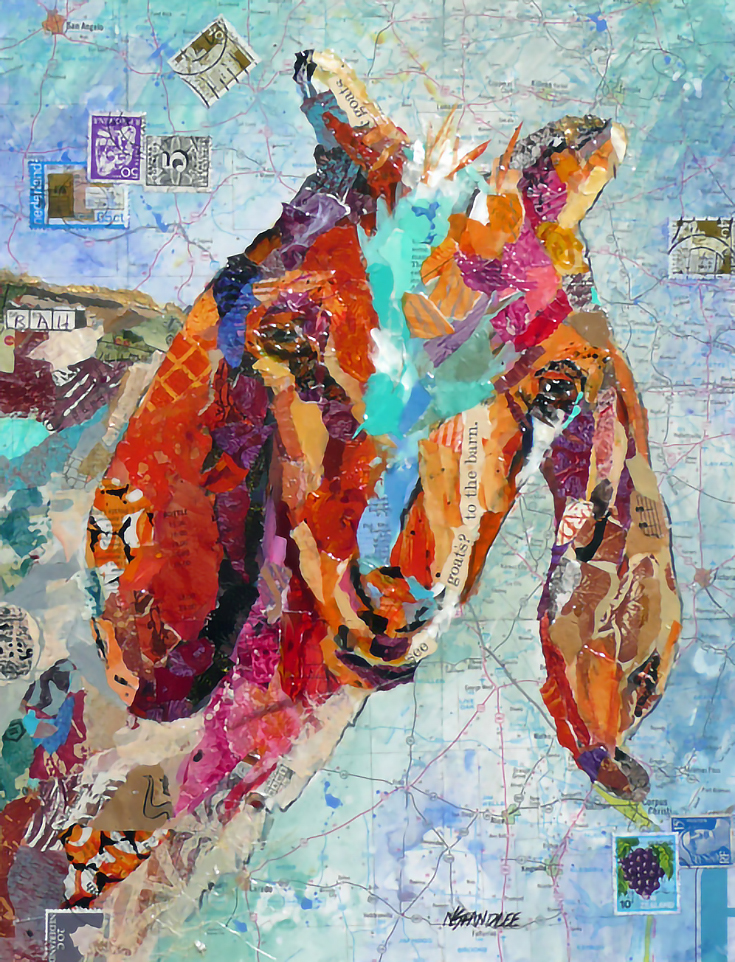
Try both mediums to see which work best for your purposes. Collage is a very forgiving medium! If it doesn’t look good, paste another piece over it. As one of my collage instructors, Gerald Brommer says, “You can keep working on it until you can’t pick it up.”
7. Varnish and display!
Once your collage is dry, I recommend brushing on Golden UV Topcoat in semi-gloss or gloss to protect it from fading. After that, just hang and admire!
For more articles and artwork from Nancy Standlee, please visit her art blog.
This post may contain affiliate links.