An easy way to get others to spread the word about your blog is to create a “grab button” that fits in the sidebar of their blog. (This allows other bloggers to grab your logo or image and link to your blog, just by coping and pasting some text.)
For the purpose of this tutorial, I am going to show you how to create a simple, no-frills button using your blog’s current logo. Of course, you can create something far more elaborate if you’d like, based upon your photo editing skills.
I used Corel Paint Shop Pro X2 but you can use whatever photo editing program you’re most comfortable with, like Adobe Photoshop, Picasa, or GIMP.
Step 1: Design your button
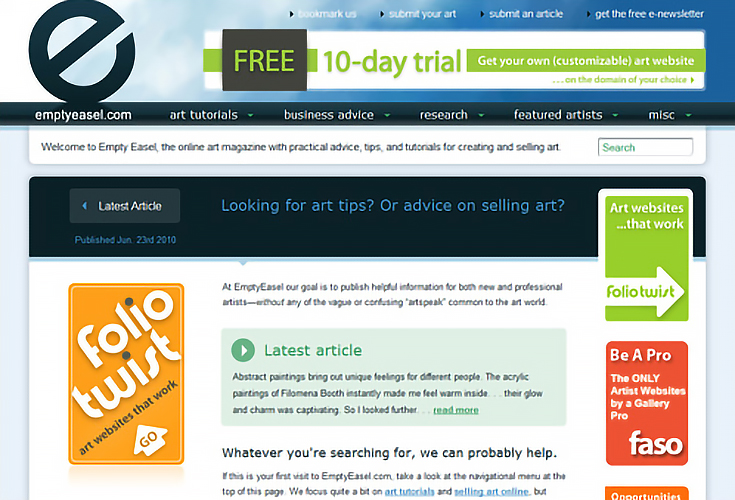
Go to the homepage of your blog or website. Scroll up or down to the part of your blog’s design that you’d like to use in your grab button then click on the “Print Screen” key on your keyboard.
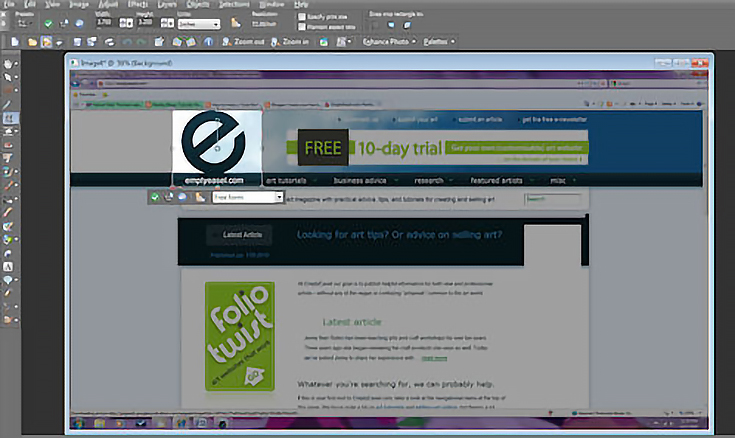
Open up your photo editing program and “paste” in your screen image.
Select the crop tool, resize the tool around the part you’d like to use as the “grab button”, then select the “apply the crop” (in my case the green check).
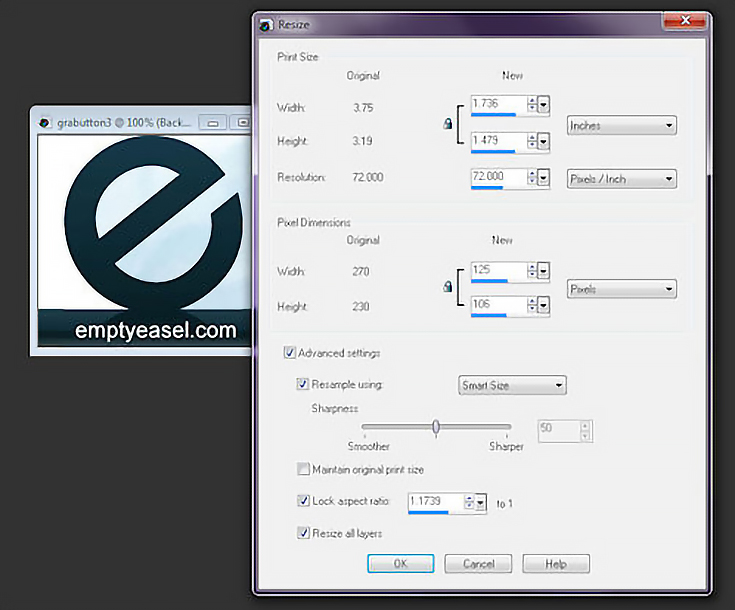
On the toolbar, click on “image” then “resize."
A pop-up window will open asking you what you want to resize your image to. Under “pixel dimension” choose 125 for width then click “ok”. (It could be that another size would work better for your blog, but 125 is what I chose.)
At this point you can add text to your button, or if you just cut out part of your logo as I did, you can simply save your grab button. (i.e. mygrabbutton.jpg)
Step 2: Upload your button to the web
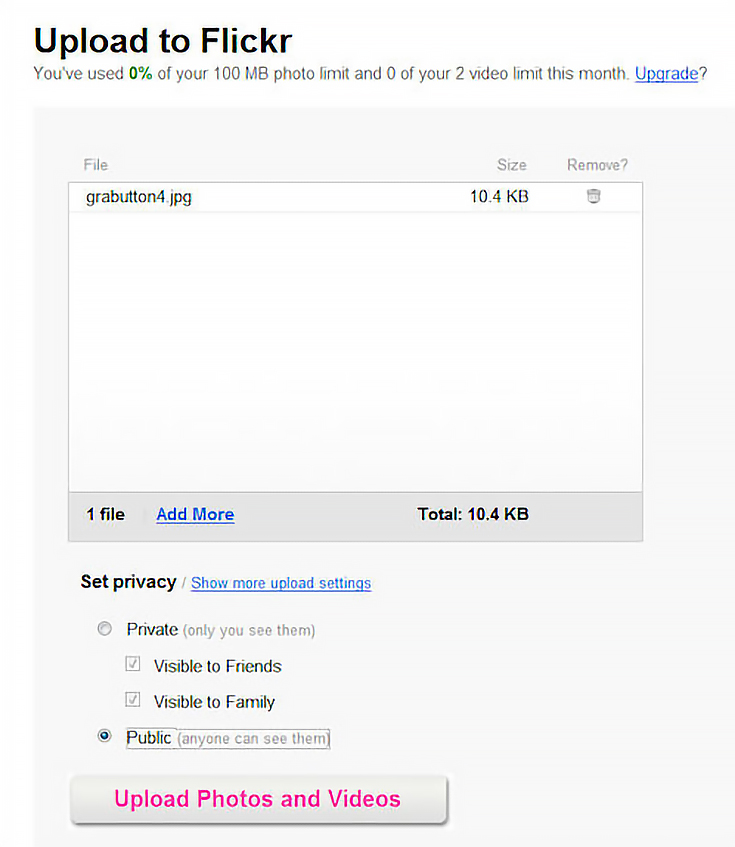
Log into your favorite photo sharing site, like Flickr (www.flickr.com ), and go to the “upload photos” area.
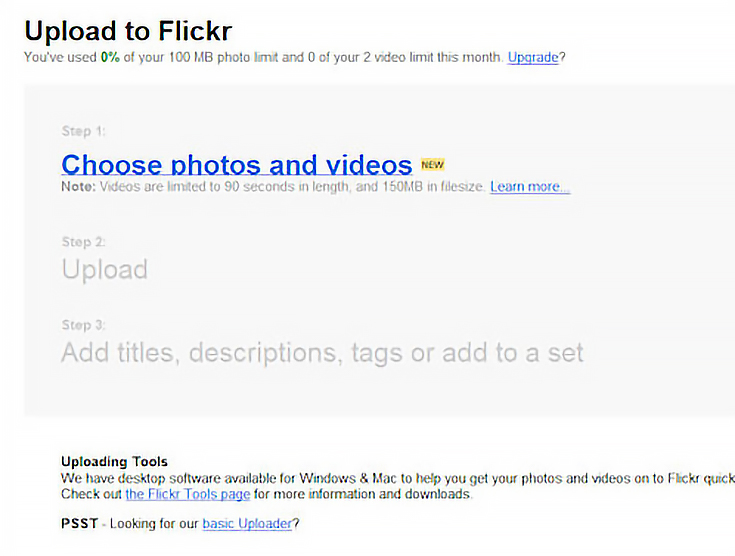
Upload your grab button, and select “public” under the privacy settings.
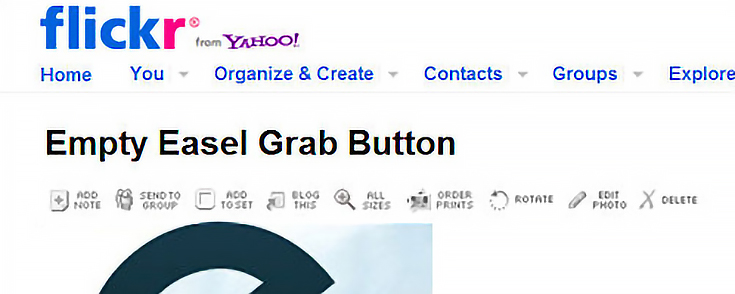
Once the grab button is uploaded, go to your gallery page and click on the image of the button.
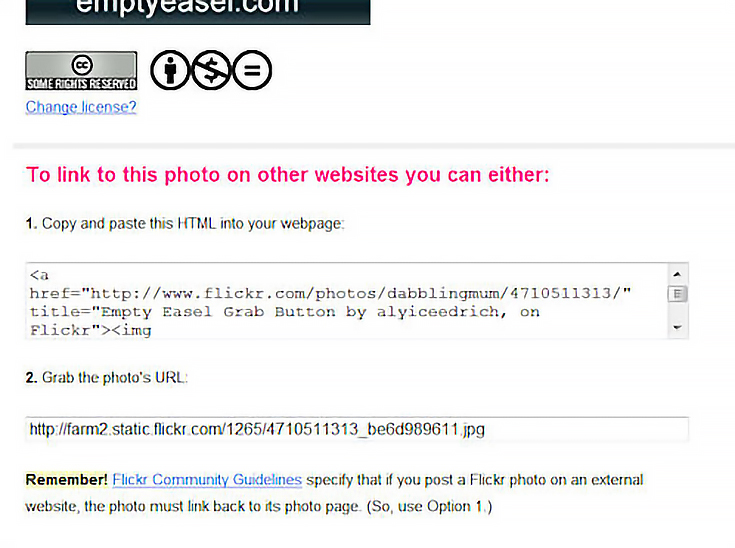
Click on the “all sizes” link above the image, click the appropriate image size, then scroll down to grab the photo’s url destination. You will need the URL later so keep this page open.
Step 3: Place your grab button on your blog
Log into your blogger account and click on the “design” link.
Once you click on the “design” link, you’ll be taken to the “elements” page:
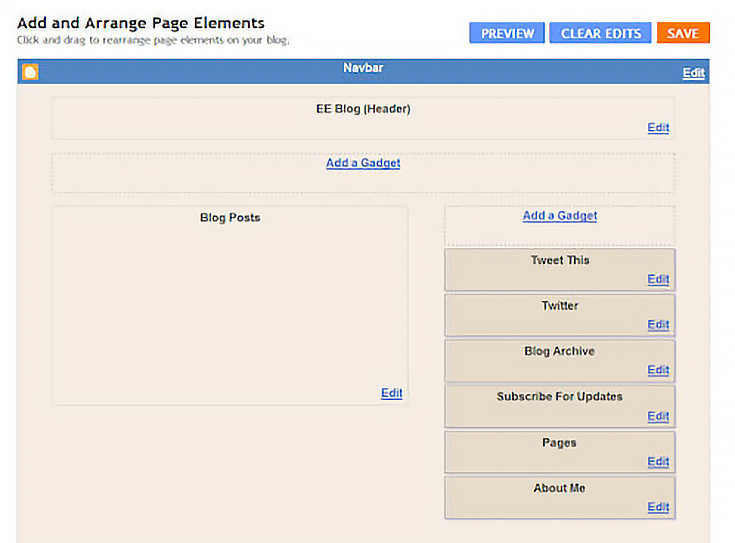
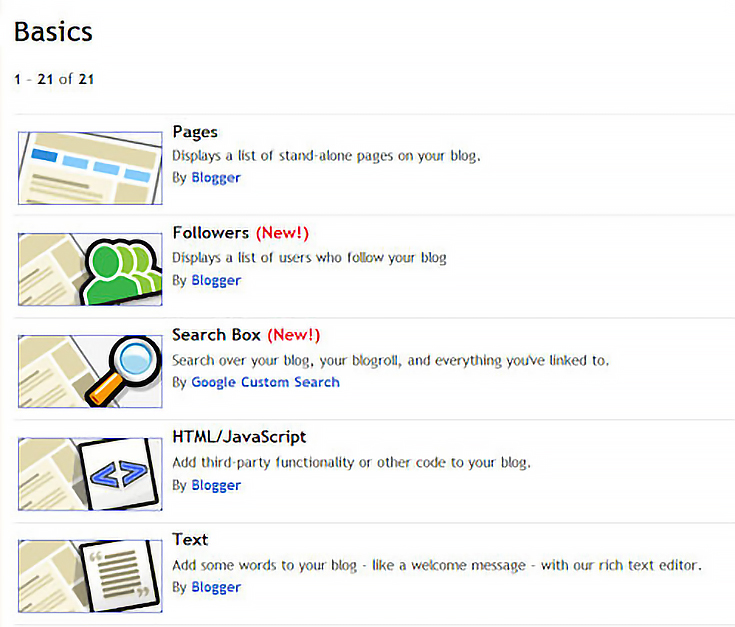
On the “elements page” click on the “Add a gadget” link in the upper right corner of the page. Clicking on the link will open a pop-up window asking you to select a gadget. Choose “html/javascript”.
Choosing “html/javascript” will take you to the following page.
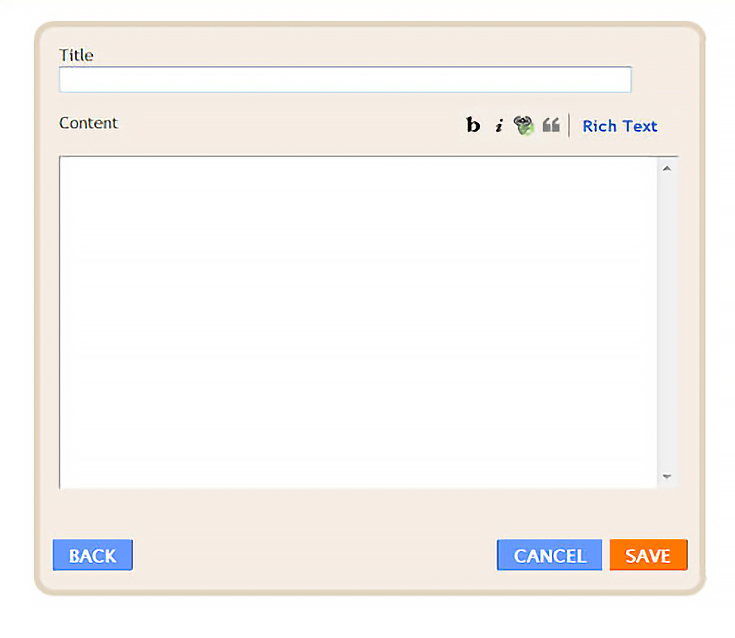
This is where you’ll add the information needed to create your grab button.
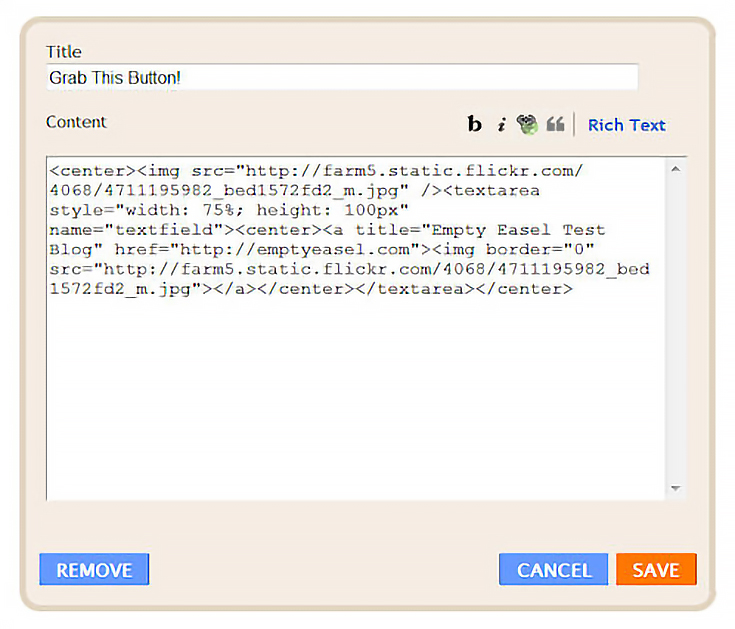
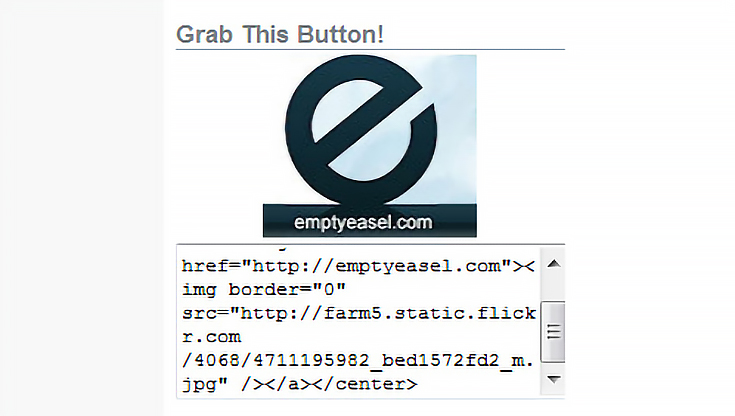
In the title area, write “Grab This Button." Then, in the large box, include the following html code:
<center><img src=”http://flickr.com/grabbutton.jpg”><textarea style=”width: 75%; height: 100px” name=”textfield”><center><a title=”Blog Name” href=”http://blogurl.com”><img border=”0? src=”http://flickr.com/grabbutton.jpg”></a></center></textarea></center>
PLEASE NOTE: You must place your own blog’s information where necessary in the paragraph above. In other words, http://blogurl.com should actually be YOUR blog’s web address.
You’ll also need the location of your photo on Flickr, so go back to Flickr, copy the URL, then replace the url addresses and titles in the HTML code with your own information before clicking "save."
Once you click “save” the pop-up window will close and you’ll see your grab button listed on the right side of the page.
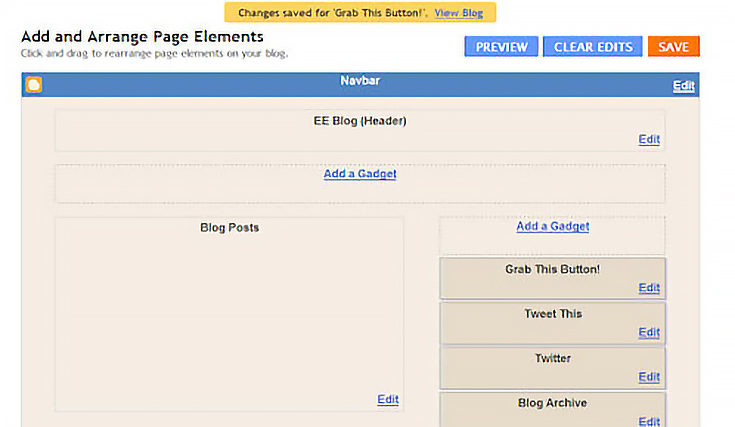
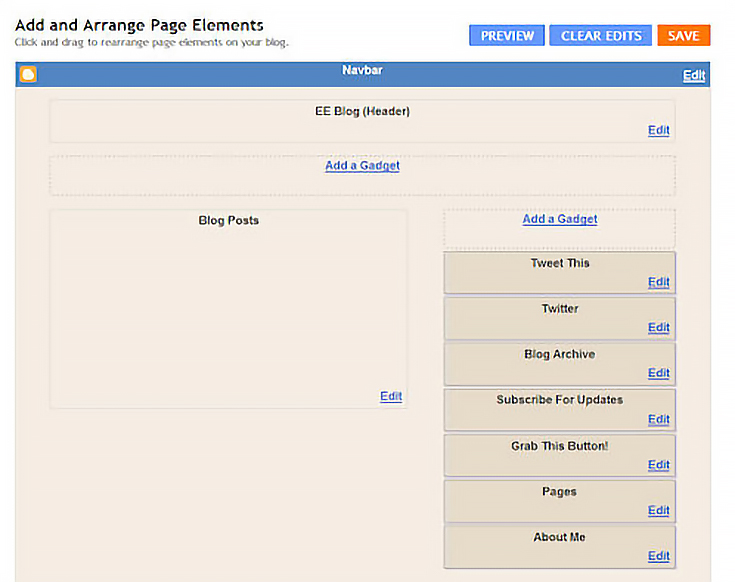
If you don’t want your button to show up at the top of your sidebar, just click and drag the button to where you want it placed on your sidebar, as shown below.
Voila! You’ve just added a grab button to your blog! It should look something like this (but with your own logo, of course):
And honestly, if you follow the steps above, it’s not as difficult as it might seem. :) Good luck!
This post may contain affiliate links.