Adobe Photoshop allows artists to alter photos and images in amazing ways. One of the more subtle (and often very effective) changes that you can make to an image is to add depth of field.
What is Depth of Field?
The term depth of field is used to describe the area in a photo that is in focus (as opposed to being out of focus).
For instance, when you look at a real landscape, outside, some objects will be in focus and others will be out of focus, depending on what your eyes are looking at within the scene at any given time.
Photographs of that same landscape, no matter how well they are produced, may not be able to recapture that same depth of field that you saw and remembered.
Photoshop lets you create depth of field where there was none before, or enhance the depth of field that’s already present. You can use this technique to tweak a photo to be closer to the original impression you had of a scene, or if you just want to exert more control over the final image.
How to Add Depth of Field to Images
Every image will be different, but the first step is to select the area which you plan on blurring, or putting “out of focus.”
In this tutorial I’ll be enhancing the depth of field already present in the photo below, so I’ll be selecting primarily the left half of the image.
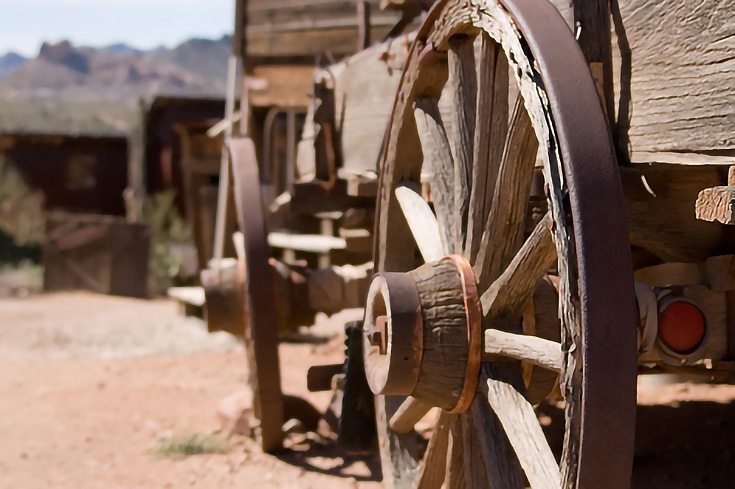
As you can see, objects naturally become more blurred the farther away they are from the focal point of an image—this means that your selection will need to fade out as it gets closer to the main subject.
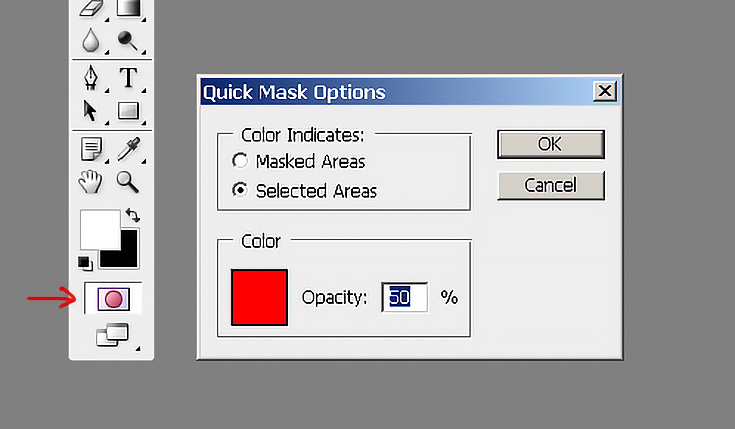
To create that “fading” selection, first enter Quick Mask mode by double-clicking on the button near the bottom of the tool bar.
Under “Color Indicates” choose “Selected Areas” and press OK.
Now that you’re in Quick Mask mode, choose the Gradient tool from the toolbar and draw a line across your image. It should add a fading red section over the top of the picture, like this:
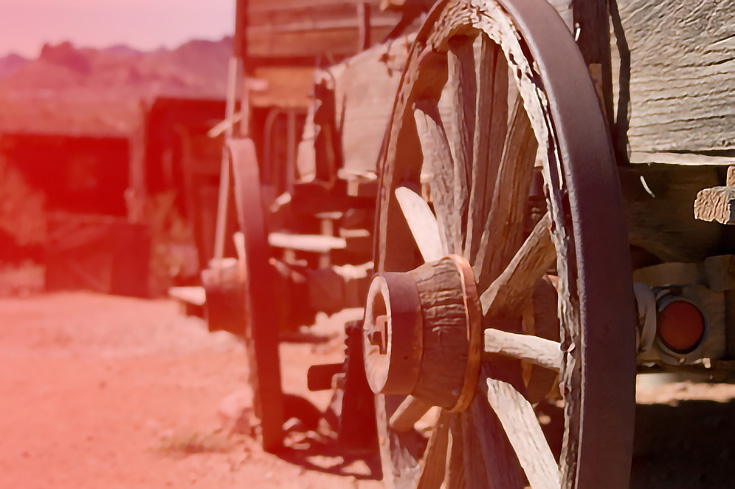
(Make sure the red fades out towards your planned focal point—that’s very important.)
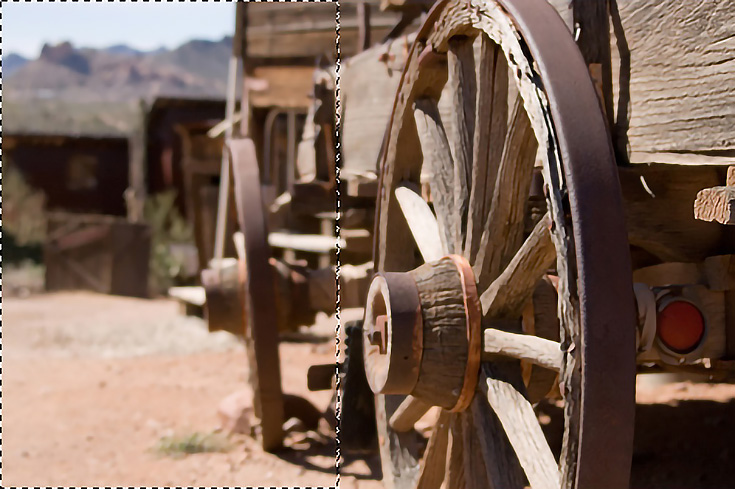
Once the gradient is in place, exit Quick Mask mode by clicking on the same button near the bottom of the toolbar. You should see a selection box on your screen, covering roughly the same area as your gradient.
Now it’s time to blur. From the main menu bar select Filter >> Blur >> Lens Blur. A new screen will appear with lots of options on the side and your picture in the middle.
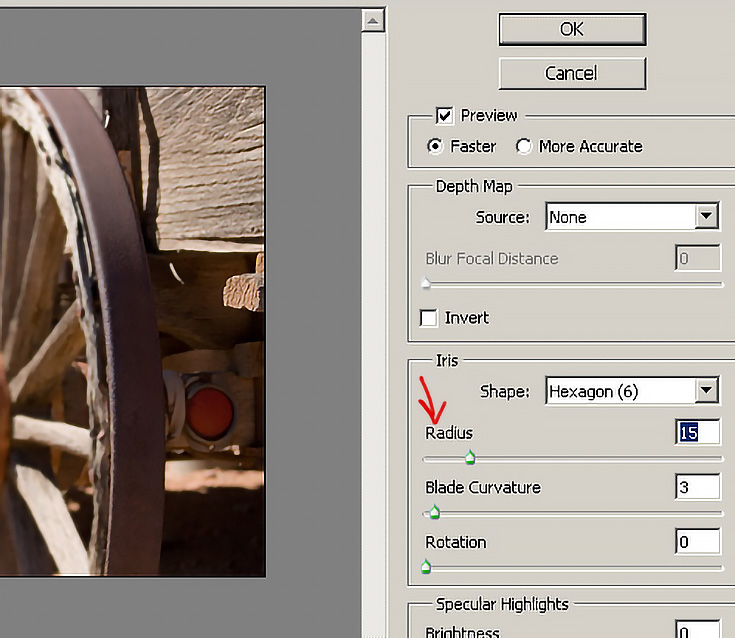
The only thing that matters, though, is the radius slider. Move it left or right to adjust the amount of blur that you’d like.
You’ll quickly find out that too much depth of field looks unnatural, and may distract from picture rather than enhance it—so use this technique with care.
Once you’ve found the perfect amount of blur, click OK, and you’re done!
Kaitlyn Miller writes for Printplace.com, an online printing company that offers postcard printing, business cards, posters and more.
This post may contain affiliate links.